For most professional designers, Photoshop is the tool of choice. While there are other editors out there that offer similar functionality, none can match the popularity or the massive, passionate community that Photoshop enjoys. The application is ubiquitous in the design world, and with good reason.
The true power of Photoshop is the vast community that has formed around it. This community is where the software’s true power lies, with designers, photographers, and creative authors sharing their knowledge, techniques, and resources freely. These tutorials and resources are invaluable for anyone looking to learn new skills and techniques in Photoshop, and they make it easy to master even the most complex tasks.
This collection of Photoshop tutorials focuses on helping artists, illustrators, and designers learn how to use Photoshop to create digital art, covering topics like photo manipulation, digital painting, and graphic design. They all provide step-by-step instructions and may be written articles, video tutorials, or online courses.
So if you’re a designer, photographer, or anyone looking to unleash their creativity with Photoshop, don’t hesitate to jump in and explore. With its massive community, endless possibilities, and unrivaled power, Photoshop is the ultimate tool for anyone looking to create stunning visuals and bring their ideas to life.
Painting Photoshop Tutorials
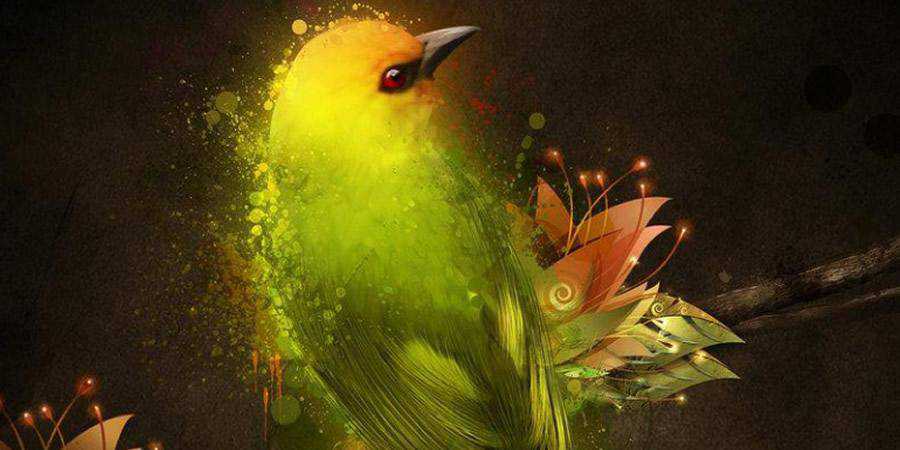
How to Create a Colorful Fantasy Digital Painting
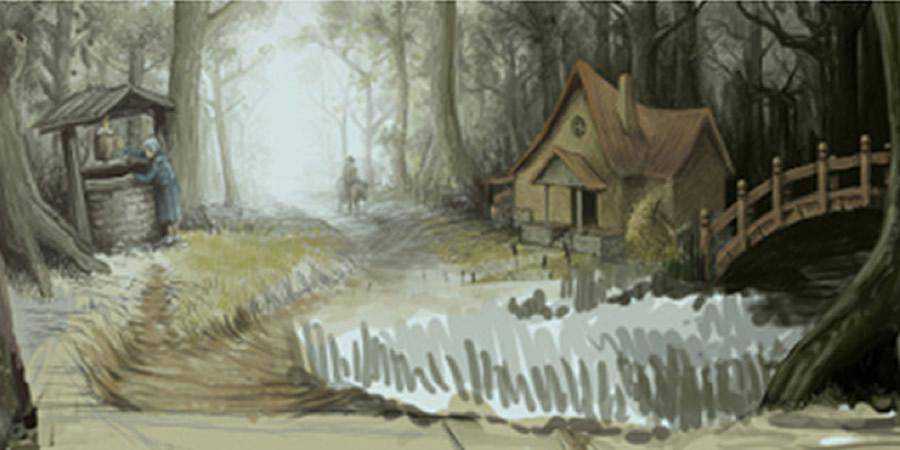
You don’t have to grab an easel to create a beautiful fantasy painting. This Photoshop tutorial will help you get started without a sketch and only with basic brushes. It outlines and clarifies all the steps you need to take to understand digital painting and create beautiful artwork.
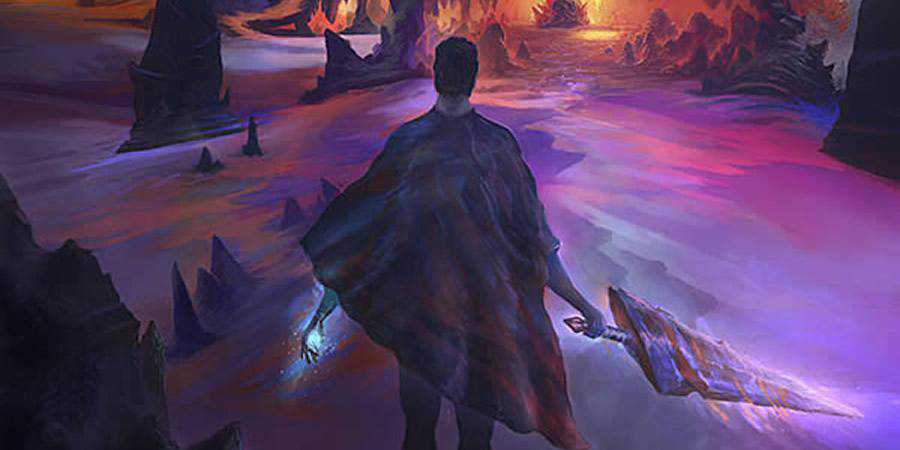
The Making of Seance
Learn how to conjure contrasting images that convey dark and moody atmospheres with this Photoshop tutorial. The artist walks you through their brainstorming, as well as the creation of the painting, so you understand what factored into their decisions and apply it to your own ideas.
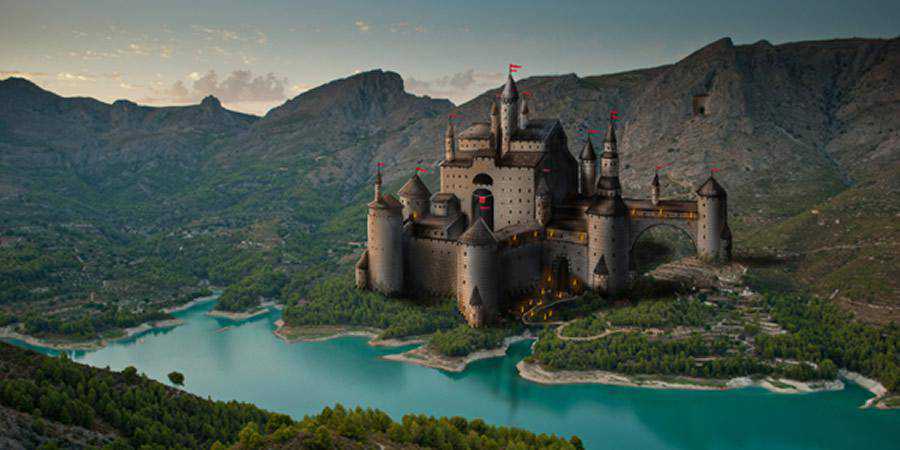
How to Paint a Castle in Photoshop
Don’t let your lack of painting skills stop you from creating exquisite artwork. This Photoshop tutorial will help you paint a hyper-realistic castle picture using Photoshop tools.
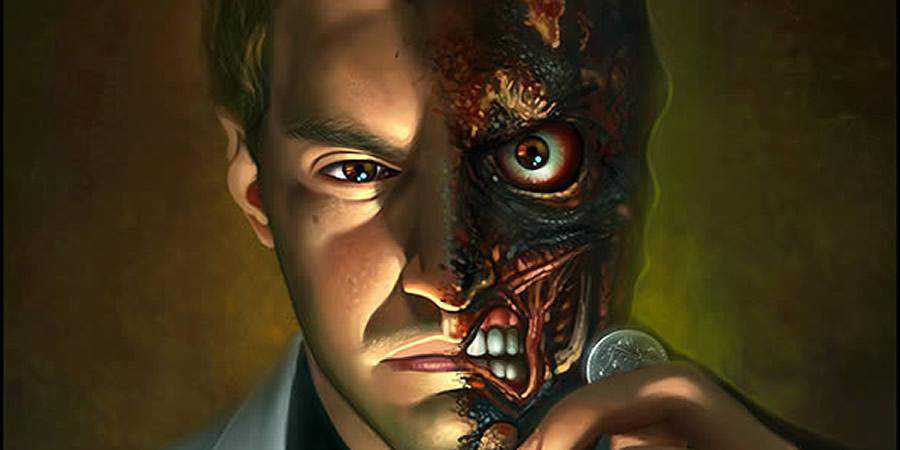
How to Create a Two-Faced Digital Painting
If you want to add more fantasy and dynamism to your Photoshop designs, this Photoshop tutorial is an excellent place to start. While the end goal is to help you create your own version of Two-Face, a Batman villain, you’ll learn a lot about creating multifaceted Photoshop artwork.
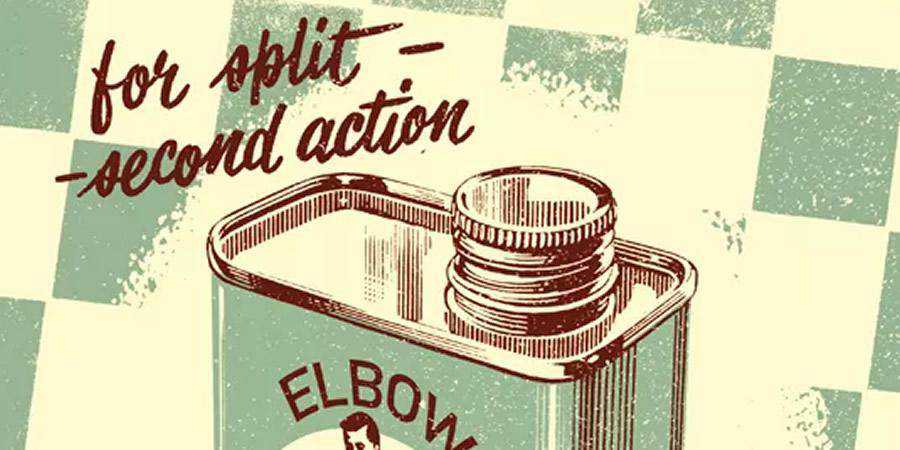
How to Create a Retro Illustration
We’ll never stop loving retro. If you’re fascinated with retro illustrations, check out this tutorial! The author will help you transform rough sketches into retro artwork with textures, brushes, shading, layers, and more! This step-by-step retro illustration tutorial is easy to follow and guarantees fantastic results.
How to Create a Medieval Battle Axe
Another entry in the Digital Art for Beginners series, this tutorial will teach you how to draw a medieval battle axe in Photoshop. You’ll also learn a lot about matte paintings and producing your own concept art so that your results reflect the vision you started with.

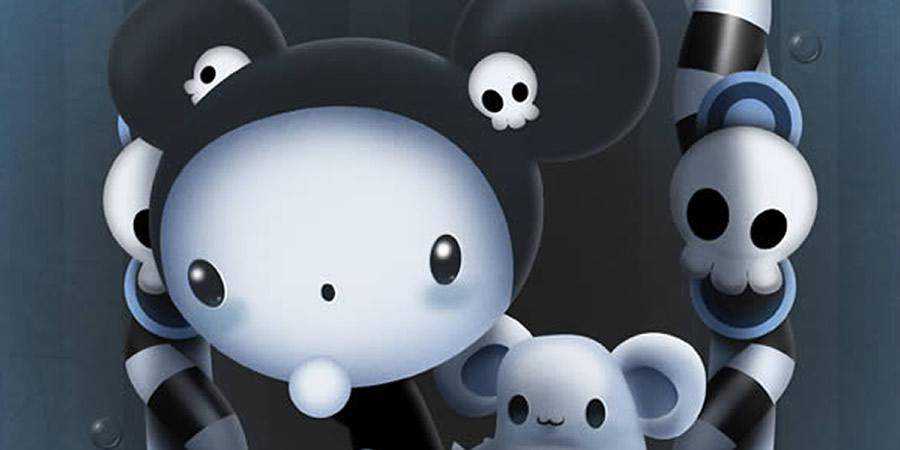
How to Create a Cute and Scary Children’s Illustration
This tutorial is perfect for Halloween art! You’ll learn how to create this cute and scary children’s illustration in Photoshop by using different pen and brush techniques, as well as shading and layers. You’ll also learn how to give your illustrations a 3D-like feel.
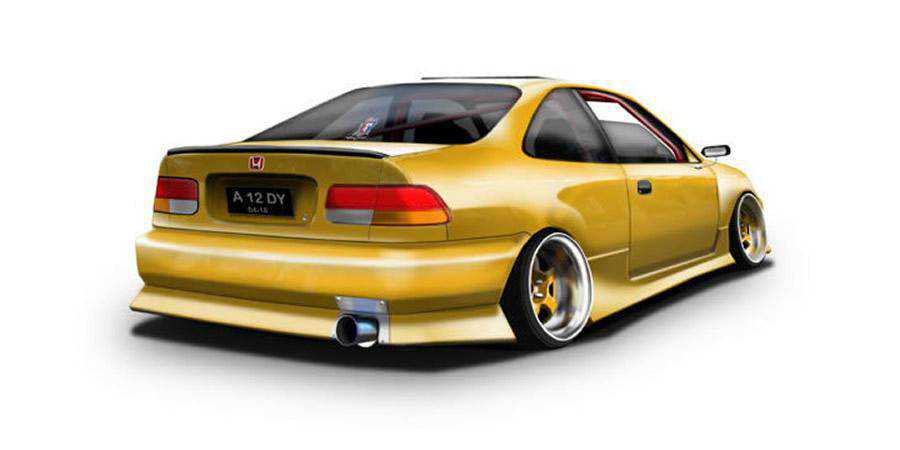
How to Create an Automobile Illustration From Scratch
Learn how to create an automobile illustration from scratch with this Photoshop tutorial. You’ll need a stock photo, and from there, the author will take you through turning your stock photo into a work of art with layer styles, perspectives, shadows, and other Photoshop tools.
Creating ‘Broken Link’
If you already know quite a bit about Photoshop tools like radial gradients and clipping masks, this tutorial is an excellent opportunity to improve your skills. Make sure you use a tablet while using it! You’ll learn how to create the title illustration with the right Photoshop features.
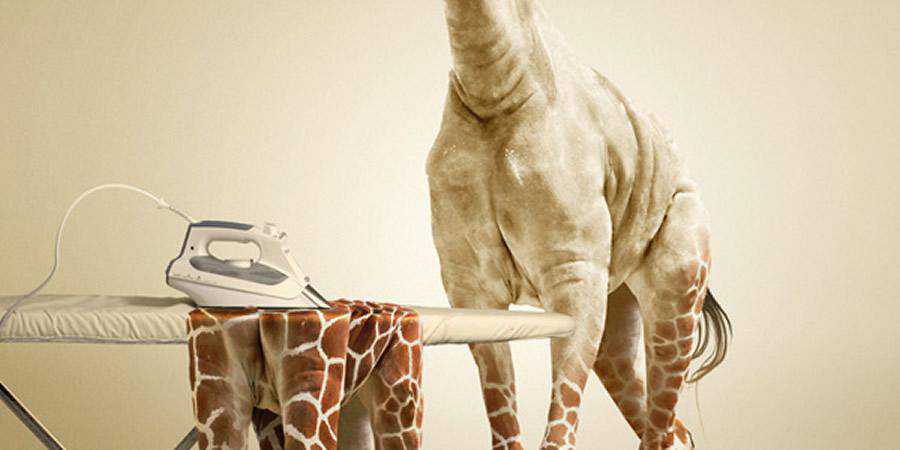
How to Undress a Giraffe in Photoshop
If you love exciting photo manipulations, this tutorial is a great way to start making your own. You’ll learn how to create realistic photo manipulations like this one that undresses a giraffe and then has it iron its coat. Brush up on your clipping mask and pattern skills!
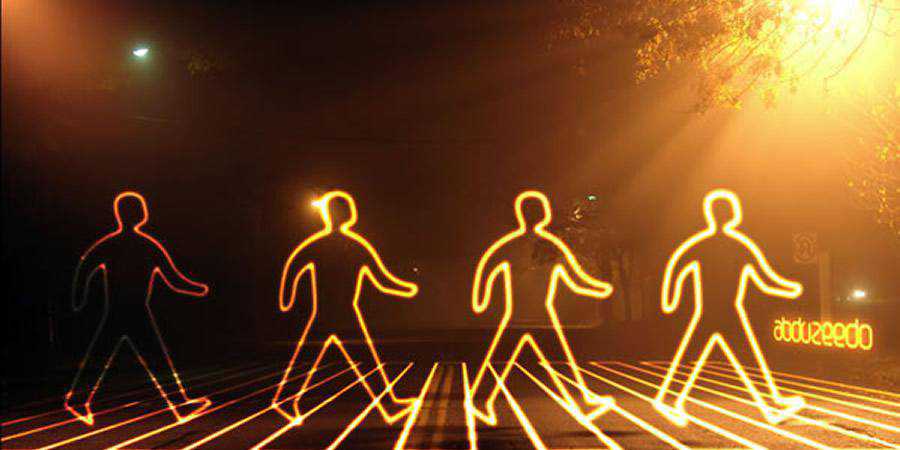
How to Create a Glowing Light Painting Effect
Is there anything cooler than neon and glowing lights? If you’d like to create interesting radiant light paintings, make sure you check out this Photoshop tutorial. It shows you how to use brushes, layers, and other tools to create similar artwork. It’s easier than you think!
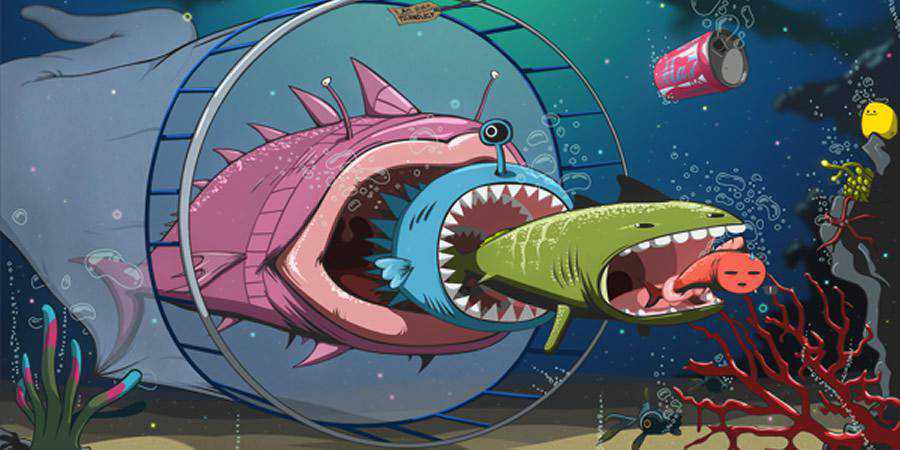
How to Create an Underwater Vector-Style Illustration
Create a quirky and dynamic vector-style illustration with some help from this tutorial. It’s best to use a tablet for this one, but you don’t need Illustrator. This tutorial will show you how to create beautiful illustrations with Photoshop, starting with the sketch.
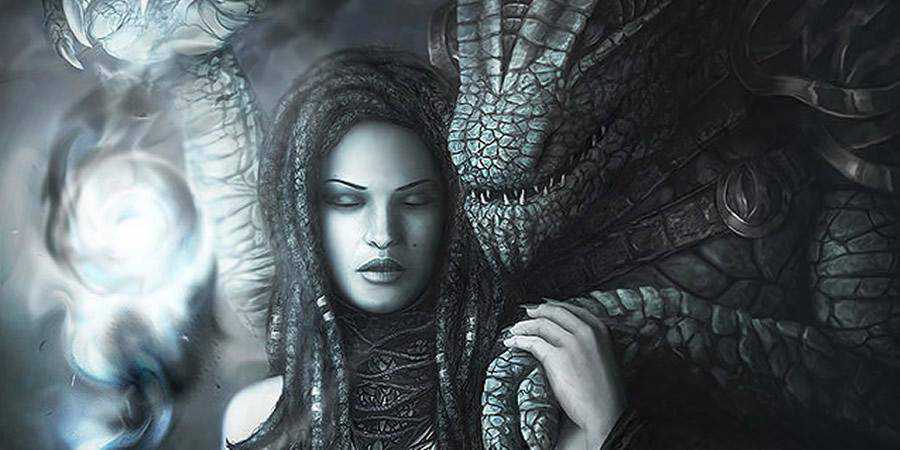
The Making of Knight
The Making of Knight is an excellent tutorial if you have already tried your hand at painting in Photoshop. This tutorial has the painting creator explain the process, from selecting brushes and color palettes to painting methods that make all the elements work seamlessly to deliver beautiful artwork.

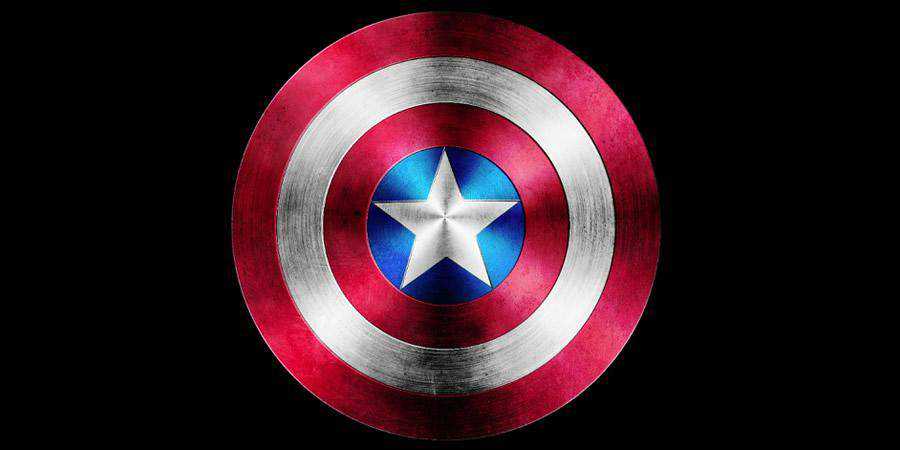
How to Create the Captain America Shield
Create a realistic shield with this Captain America tutorial for Photoshop. From sketching and selecting brushes to using textures and giving different layers of realistic shadings, this tutorial will help you create more photo-realistic designs in the future. Incredibly detailed and full of valuable tips, this tutorial is an excellent choice!
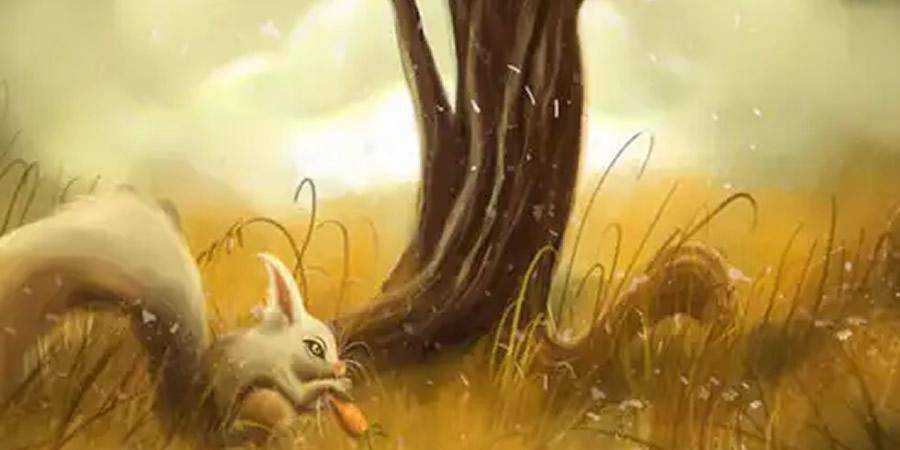
How to Create a Digital Painting
In this tutorial, the artist takes you through the process of painting beautiful scenery in Photoshop. In addition to helping you create similar paintings, this tutorial will also give you workflow tips, help you understand and create seamless compositions, and show you how to spot mistakes in your digital paintings.
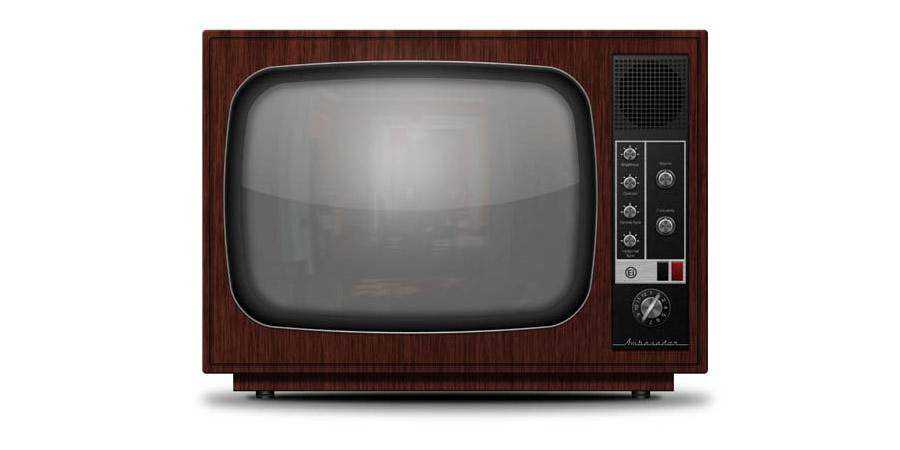
How to Create a Detailed Vintage TV from Scratch
If you love vintage aesthetics, you’ll love this detailed vintage TV tutorial, too! The author will show you how to create a photo-realistic vintage TV in Photoshop from scratch (and without using a photo to paint over). You’ll even learn how to create a realistic reflection!
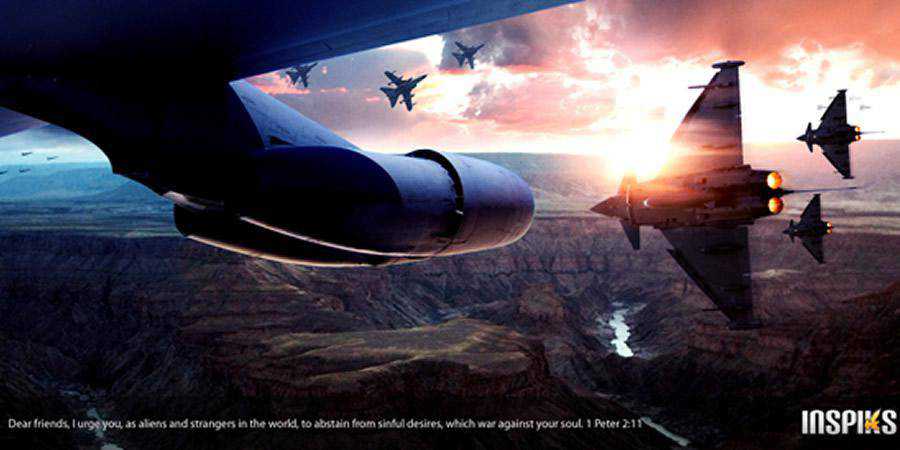
How to Create a Cinematic Aerial Scene
You don’t need a film crew to create a cinematic aerial scene. All you need is to follow this step-by-step tutorial! You’ll use a few stock photos, and the author will teach you which settings you need to use and how to create similar works.
How to Paint a Surreal Scene
If you want to learn how to paint surrealist scenes in Photoshop, you’ll love this tutorial! It’s incredibly simple and easy to follow. You’ll learn how to use brush dynamics, use gradient palettes, and add the proper lighting, so your result looks fantastical.
How to Create Stunning Comic Book Fan Art Illustrations
Comic book style never goes – well, out of style. It’s fun, engaging, and dynamic, and you’ll learn how to emulate it with this simple Photoshop tutorial. The goal is to create life-like materials with precise shadows, mid-tones, and highlights, and the author helps you get there!
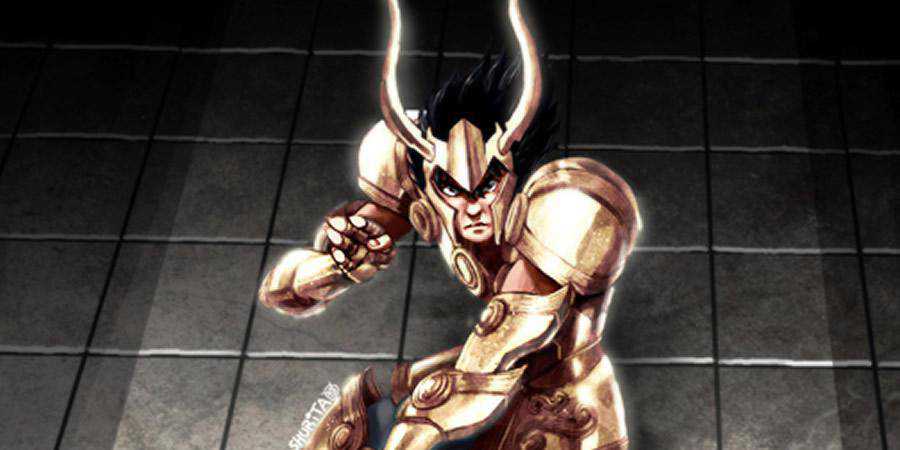
Photo Composition Photoshop Tutorials
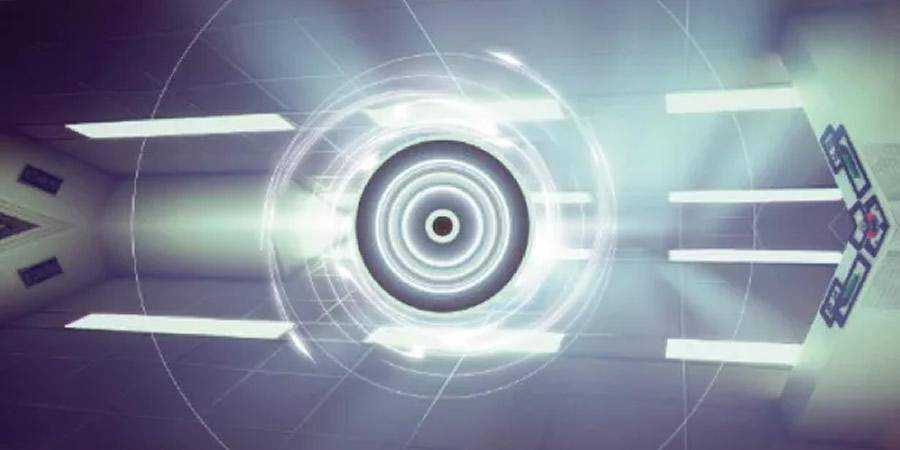
How to Create a Futuristic Composition
If you love creating a particular mood in your materials, take a look at this tutorial! Not only will you create a futuristic composition, but you’ll also learn how to add mood to your Photoshop designs with a variety of tools at your disposal.
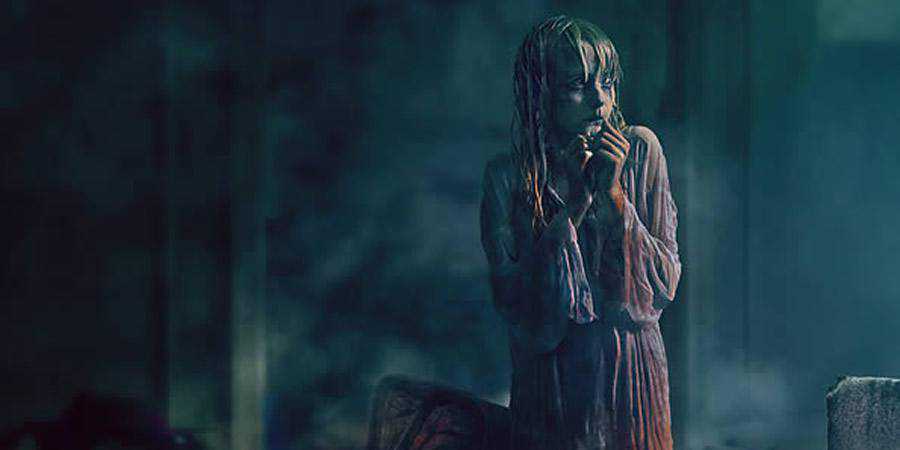
How to Create a Horror Movie-Themed Photo Composition
You don’t need an elaborate set to create a scary photo. This tutorial will help you get the same results with stock photos and Photoshop. You’ll learn to use the right light balance and depth to blend the different assets and get believable results.
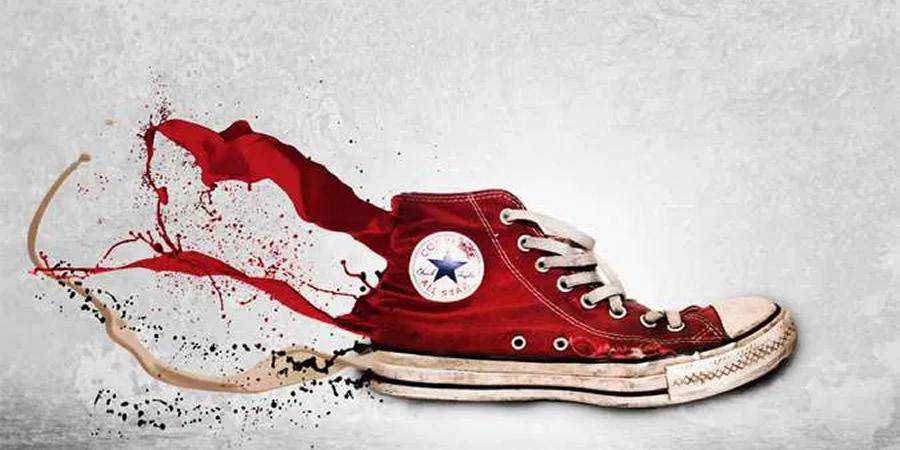
How to Create an Awesome Splashing Sneaker
Splash effects always add extra vibrancy to photos and designs. If you haven’t used them yet, this tutorial will show you everything you need to know. You’ll learn to work with different layers, textures, and gradient maps to add a splashing effect to common objects.
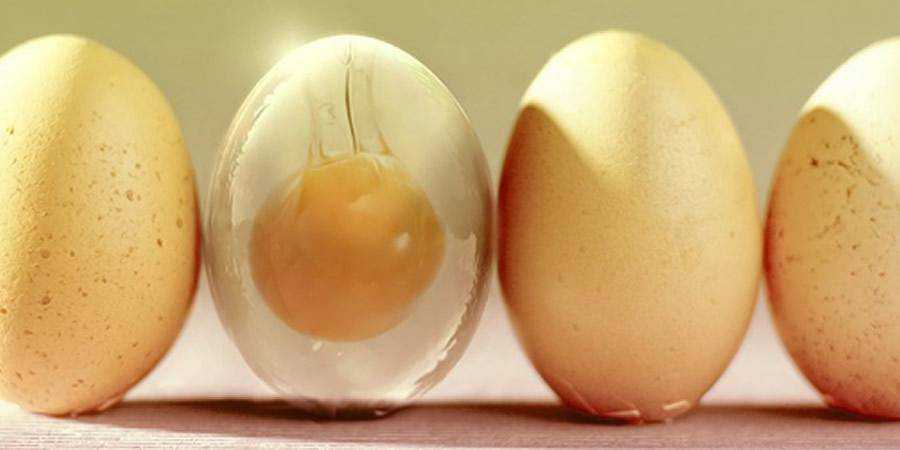
How to Create a Glass Egg in Photoshop
Turn a regular egg into a beautiful glass masterpiece with some help from this tutorial. It’ll show you how to start with a stock photo and transform it into an engaging work of art. You’ll learn how to use the Photoshop wrap tool and layers.
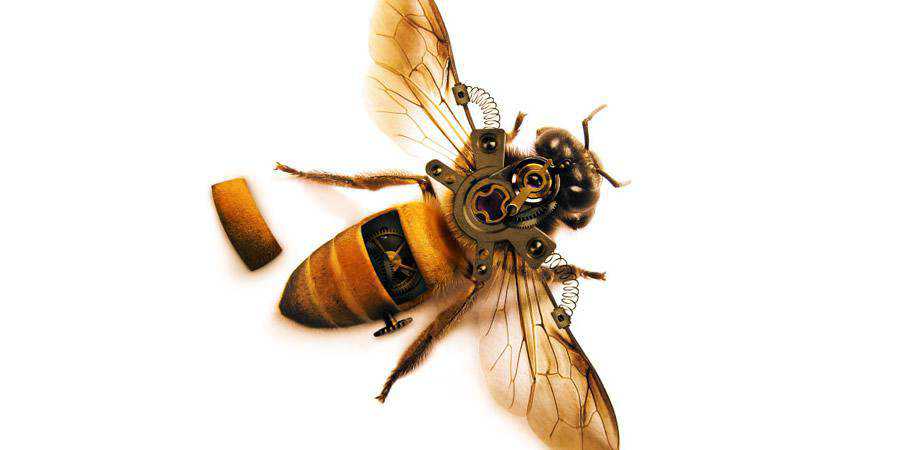
How to Create a Highly Detailed Steampunk Insect
Nothing says retro-nostalgia like steampunk, and this tutorial shows you how to transform a garden-variety insect into an interesting steampunk version of it. You’ll learn how to extract parts of other images and blend them with your original image seamlessly.
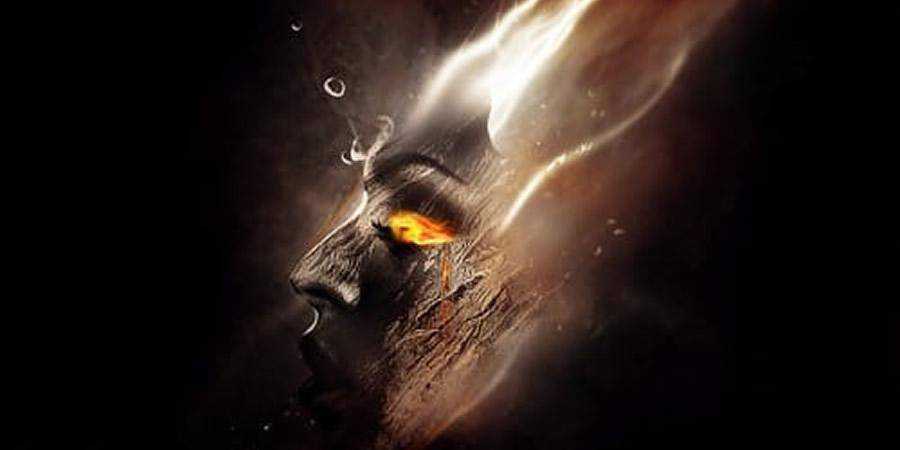
How to Create a Unique Wooden Face
Create a surrealist painting of a wooden face with lava, metal, and water effects. This is an all-encompassing tutorial, so you’ll learn plenty about working with different textures and Photoshop effects.
Drawing Photoshop Tutorials
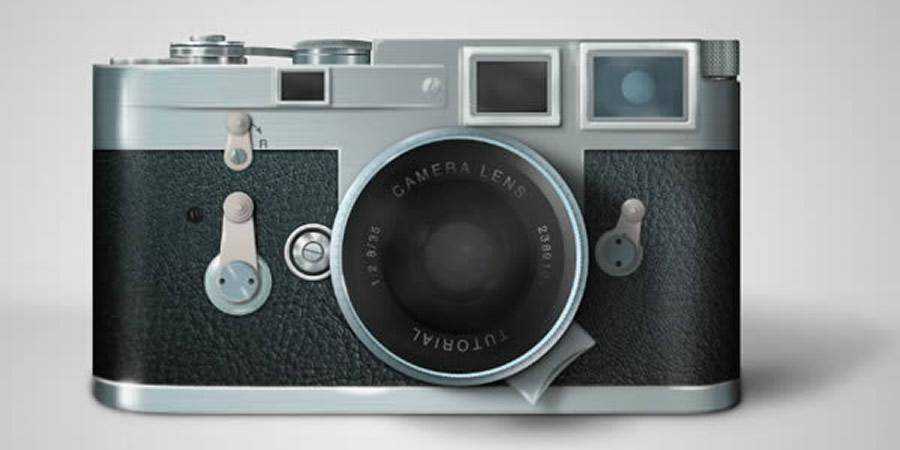
How to Draw a Leica Camera
Create a photo-realistic Leica camera from scratch in Photoshop! This tutorial is really fun and takes you through all the basics of photo-realistic image creation with just a single app (and 150 tutorial steps).
How to Create a Realistic Shoelaces From Scratch
Sometimes you just don’t want to use stock photos or take your own photos, and that’s okay! It’s why this tutorial shows you how to create realistic shoelaces in Photoshop. You’ll apply the knowledge you’ve gained to your other projects.

Photo Manipulation Photoshop Tutorials
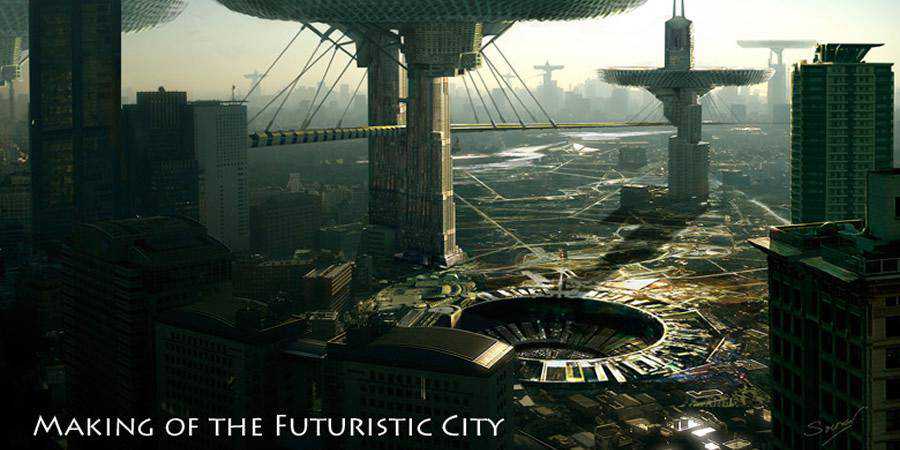
The Making of the Futuristic City
In this tutorial, the artist shows you how they’ve created the painting of a futuristic city. They’ll show you how to work with a photo as a reference and then transform it into a painting, create an atmosphere, and add details to make it your own.
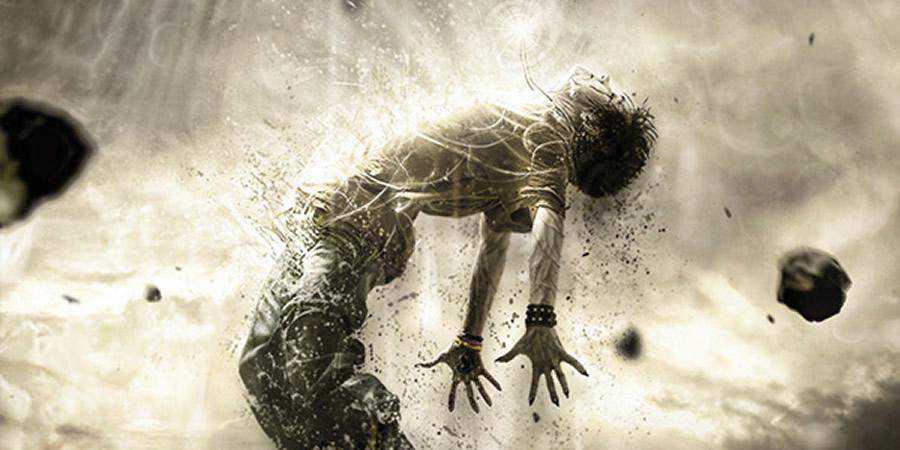
How to Create a Human Disintegration Effect
If you’ve been eyeing disintegration effects for a while, this tutorial shows you how to replicate them for your own designs. You’ll work with stock elements and then learn how to adapt them to fit your desired mood, as well as create the effect of disintegration.
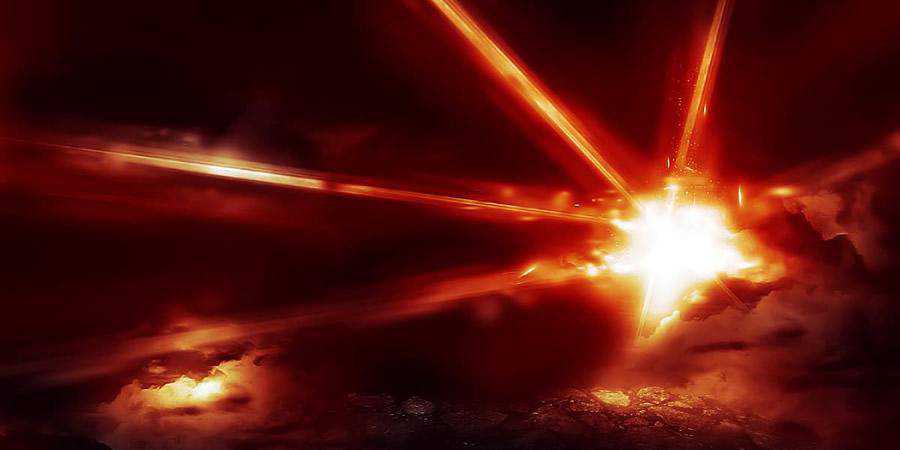
How to Create a Realistic Laser Beam Effect
If you love video game visuals, you’ll love this laser beam Photoshop tutorial inspired by Battlefield 3 cover art. Even if you’re not a PS pro, you’ll be able to follow this tutorial. You’ll work with different features to create the effect.
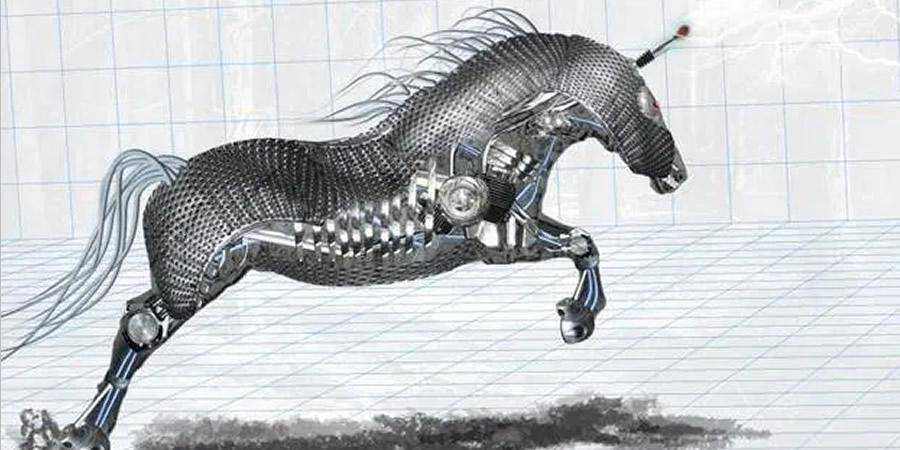
How to Create an Amazing Mechanical Horse
Photoshop is perfect for photo manipulations, so check out this tutorial. It’ll show you how to create a mechanical horse with different stock assets and blend them together, so you get a fascinating result. It’s detailed and easy to follow!
How to Create a Night Light
Learn how to work with different textures, brushes, and stock packs to create a beautiful night light painting in Photoshop. The author offers plenty of helpful advice to help you understand how every step contributes to the result. You’ll also learn how to blend different assets perfectly.
How to Create a Futuristic Abstract Portrait
Add a dash of futurism to your portraits with the help of this Photoshop tutorial. You’ll learn to work with different effects and adjust layers to create this cosmically futuristic scene. You’ll also learn how to retrofit paint splatter to create a splatter effect.

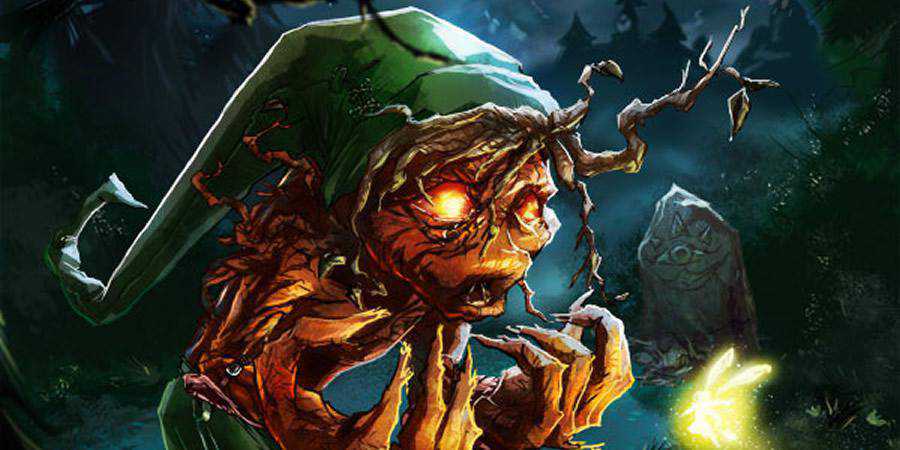
How to Create a Dark, Supernatural Magic Figure
If you already have experience with Photoshop and photo manipulations, this tutorial is a great way to improve your skills further. You’ll create this dark and dramatic scene of a supernatural figure using masking, vexel art hair, and other handy Photoshop features for photo manipulation and retouching.

How to Create a Stunning Product Shot Using Professional Lighting Effects
If you want to improve your product photography editing process, you’ll love this tutorial! It’ll help you create dynamic lighting effects like a true pro. The tutorial walks you through all the aspects you need to understand in order to create similar images in the future.

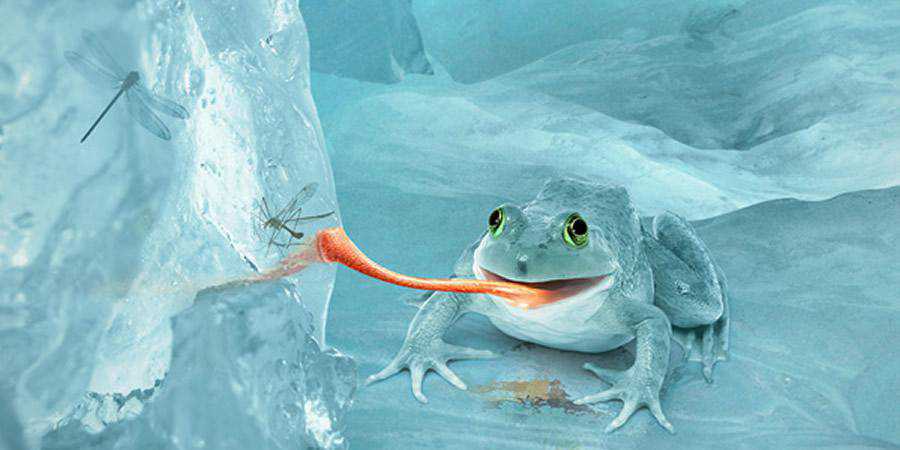
How to Create a Fictional Arctic Snow Frog in Photoshop
This tutorial shows you how to use different graphic assets to create a fun and vibrant Arctic snow frog manipulation. The tutor will show you how to create a believable background and blend all the elements together to get a fantastic image your audience will love.
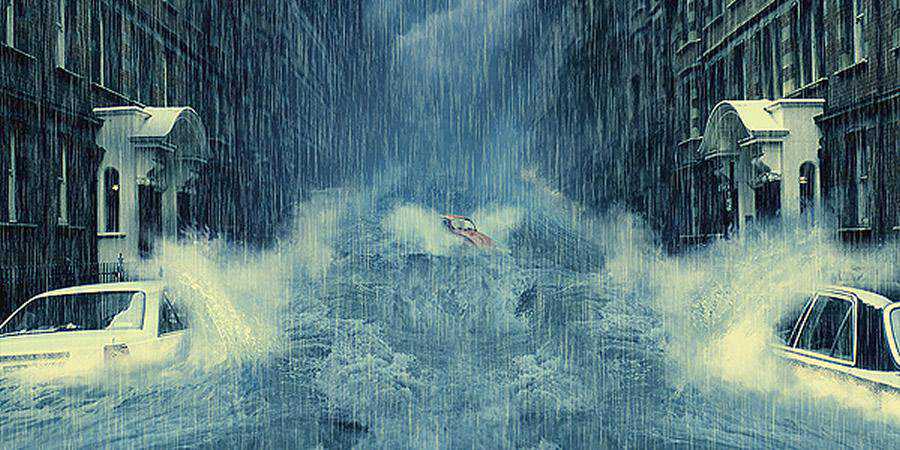
How to Create a Photo Manipulation of a Flooded City Scene
Transform a perfectly ordinary scene into something straight out of a movie with the help of this Photoshop tutorial that will help you create a manipulation of a flooded city scene. The author helps you use the clone stamp tool and other Photoshop features to create a believable result.
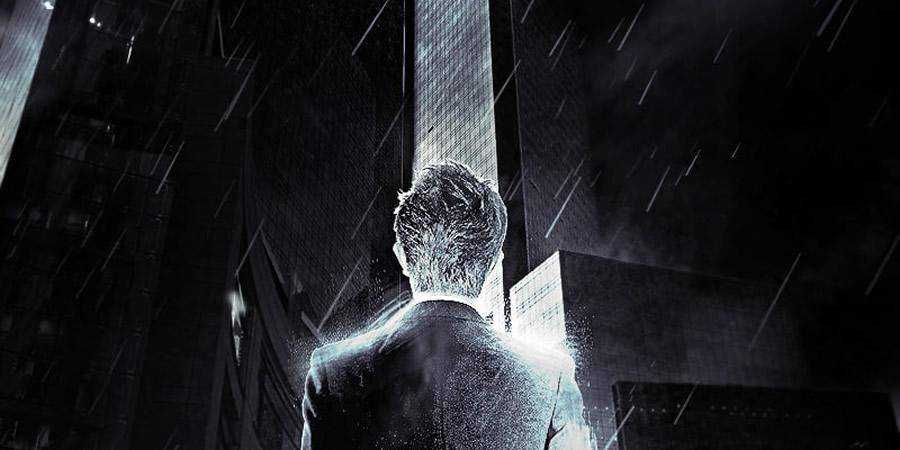
How to Create a Dark Surreal Urban Scene with Space Brush
This tutorial will help you manipulate different stock assets to create a dark, surreal urban scene. You’ll use brushes, curves, and a plethora of other Photoshop tools to help you tell a grim story. Check out this tutorial if you want to create a scene straight out of Gotham!
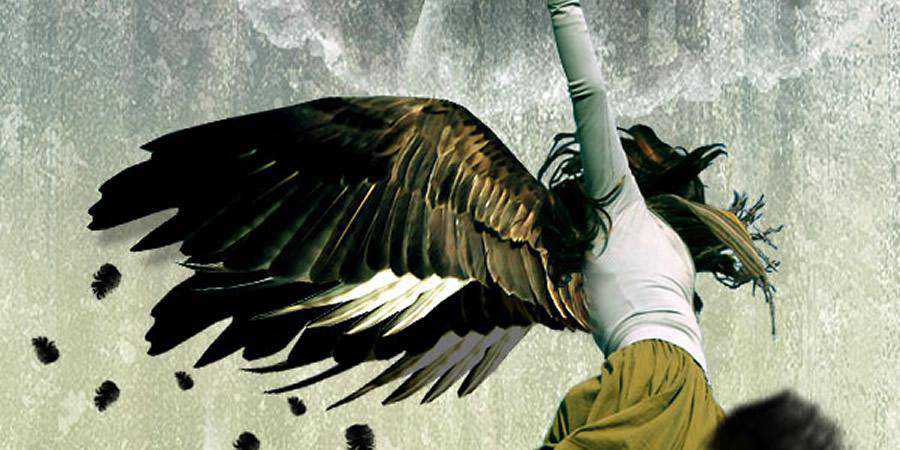
How to Photo Manipulate a Falling Angel
Create a photo-realistic image of a falling angel with the help of this Photoshop photo manipulation tutorial. You’ll learn to work with textures to create a seamless background, blend different elements, use color balance, and add the necessary finishing touches to create a fantastic image.
How to Create Transparent Masks
When editing photos in Photoshop or creating photo manipulations, selections are an absolute must. However, using them with transparent elements can get tricky. This tutorial will help! It’ll teach you how to properly select the example object (glass) to contain transparent elements and transform them.

3D Tutorials
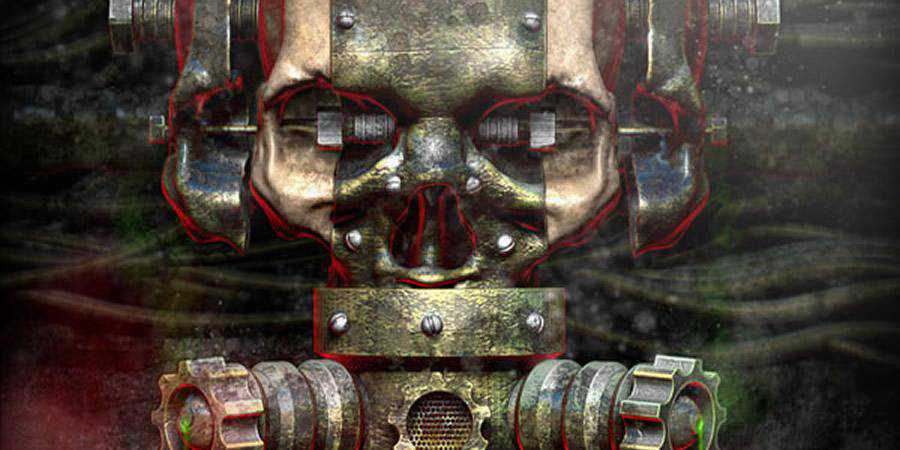
How to Create a Rusty Metallic Textured Skull Using 3D Renders
Brush up on your 3D render skills with this photo manipulation tutorial. The author will help you work with ZBrush materials and lighting renders to create a metallic textured skull and apply your new knowledge to other projects, as well. You’ll also learn how to add steam effects.
How to Create a Cereal Box Cover from Scratch
Add a 3D effect to your photos by following this simple and powerful Photoshop tutorial! The tutorial walks you through creating a cereal box cover with 3D elements from scratch, but you’ll learn plenty about creating 3D layers in general (even if you’ve never used them).

How to Create Futuristic Effects with Photoshops
You don’t need anything but Photoshop CS6 to create highly-stylized 3D illustrations. This tutorial shows you how to use the 3D panel and turn 2D images into photo-realistic pictures. You’ll also learn to manipulate depth layers and use gradients to produce exciting results.
Poster Design Tutorials
How to Create the Avengers Poster
The Avengers logo has a characteristic metallic shine. This tutorial shows you how to replicate it so your designs can gleam in the light, too! You will work with layer styles, brushes, and blur. If you want to improve your layer adjustment technique, this is the perfect tutorial for it!

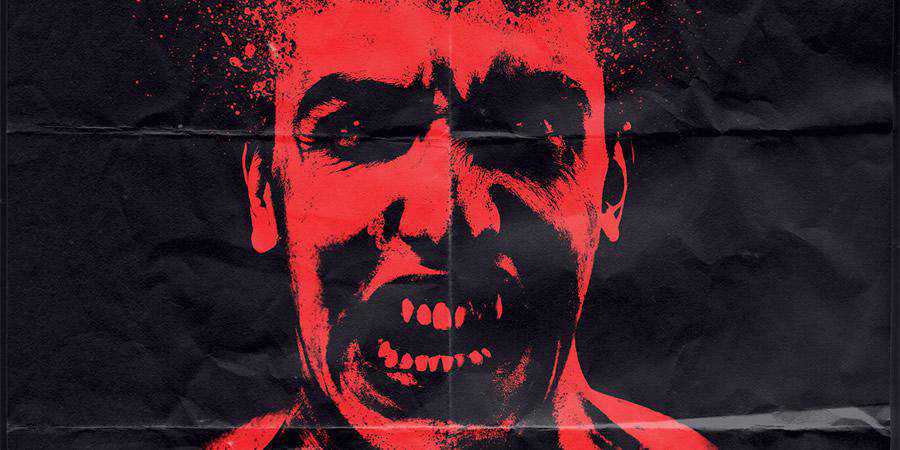
How to Create a Raw Horror Movie Poster
Create an old-school horror movie poster with this Photoshop tutorial. It’ll show you how to work with grungy textures, bold palettes, and color levels to create a thrilling (and terrifying) design.
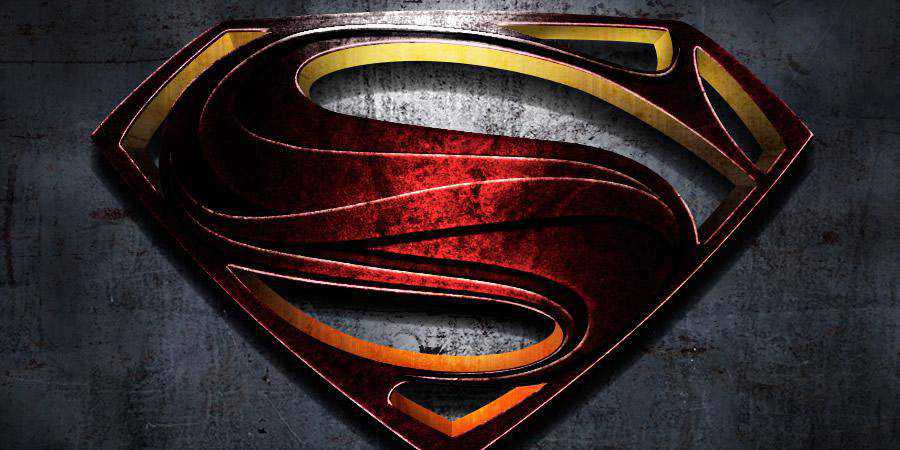
How to Create the Man Of Steel Movie Poster
Superman’s logo is widely recognizable, and the movie Man of Steel made it look even more extraordinary. In this Photoshop tutorial, you’ll learn to recreate the Man of Steel movie poster.
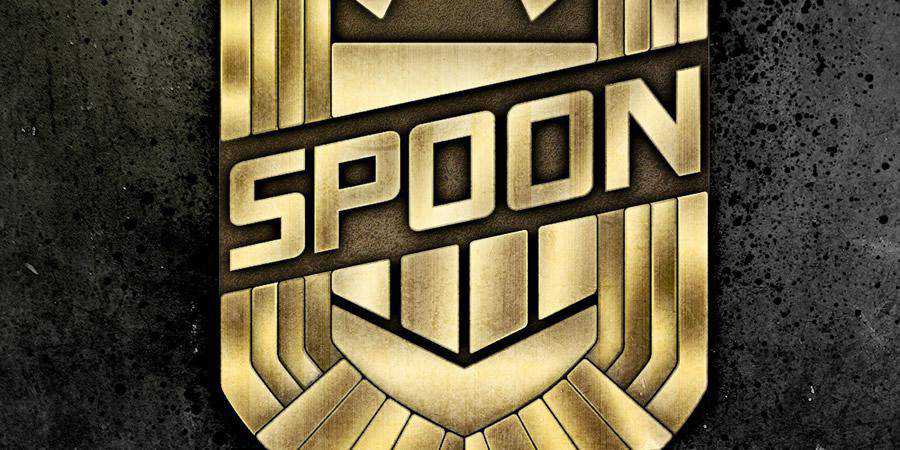
How to Create the Judge Dredd Badge Design
Create your own Judge Dredd badge design with this helpful Photoshop tutorial! It’ll walk you through the necessary steps, from creating the signature distressed metal appearance to blending layers. This tutorial also uses Illustrator for drawing, but you can get beautiful results with just Photoshop, as well.
How to Create the Dark Knight Rises Stencil Effect
Stencil and spray effects are perfect for urban, gritty atmospheres. If that’s just what the designer ordered for your next piece, take a look at this Dark Knight Photoshop tutorial. You’ll learn to recreate the signature stencil and spray effect with Photoshop filters and brushes.

How to Create a Classic Serif Poster
Never underestimate serif’s ability to make your designs elegant. In this tutorial, you’ll learn how to work with serifs and turn your standard text into breathtaking typography. The author takes his time guiding you through the principles of serif typography to help you create fantastic designs.
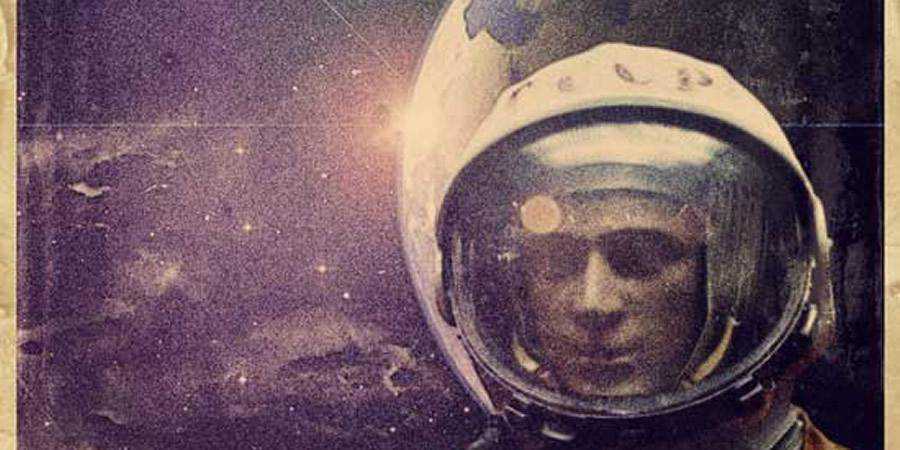
How to Create a Retro Space Themed Poster
Travel back in time to April 12, 1961, and the famed Gagarin Moon landing with this interesting Photoshop tutorial. You’ll work with stock photos, textures, brushes, and different blend methods to create a retro, space-themed illustration for your next project. It also works perfectly as a grungy poster!
How to Create a Clock Up Wallpaper
3D typography will be a huge trend, so hop on board early on! This Photoshop tutorial will help you create believable 3D text, as well as a cool, dynamic background with third-party textures and effects, to create an engaging sci-fi atmosphere. This is a great tutorial!

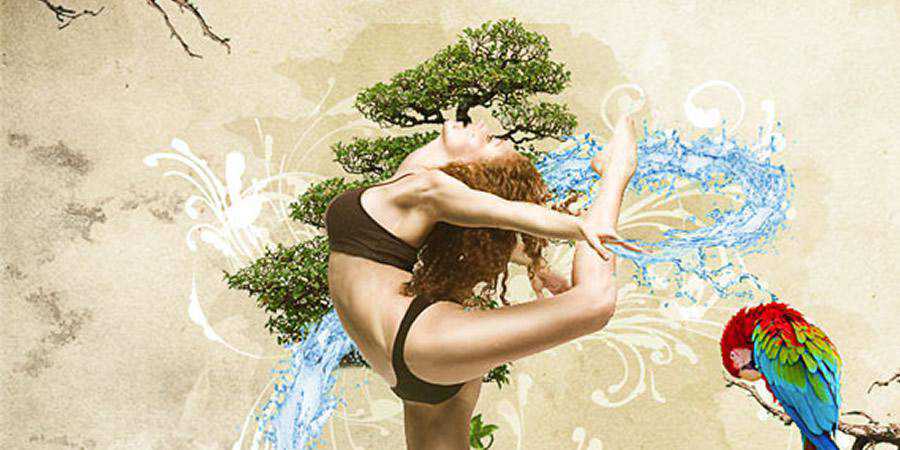
How to Create a Dynamic Nature Poster
Experiment with collages and make different elements work together perfectly with this Photoshop tutorial. In addition to recreating the dynamic nature scene, you’ll also learn to blend different elements to get realistic results. This is a must for graphic designers, so make sure you check it out!
More Photoshop Tutorial Collections
Related Topics
Top