Since starting work as a web designer, I always have, and will always, obsess over improving my project workflow and my own design pattern, if you will.
Never afraid to make a couple of wrong turns along the way, my intellectual pursuit has seen me produce wireframes in Photoshop, sketch them out in meticulous detail, and not so meticulous detail, test-drive prototyping software Axure and Omnigraffle and even…gulp… completely bypassed any formal ‘pre-production’ process. As you can imagine, the results were spectacular.
And then, there was the HTML prototype.
Short of living in a cave for the best part of a decade, you will have undoubtedly stumbled across this technique before.
The rise in popularity of the HTML prototype in more recent years is partly the responsibility of a witch-hunt that has served to oust the web designers who can’t code their own designs and shone a spotlight in the faces of those who brand themselves UX Professionals.

To summarize, these days, you’ve got to bring a lot more to the table if you expect to stay competitive. And it is the embodiment of this more diverse skill set that has led so many web designers, disillusioned with a less-than-optimal workflow, into the loving embrace of the HTML prototype.
Peer Pressure
If you find that your sketches work perfectly for you – Great. If you’re a whizz with Omnigraffle – fantastic! You should only start creating HTML prototypes when it feels natural and logical for you to do so.
Don’t integrate them into your workflow just because everyone else is, no matter how desperate you are to join in. I started using them because I got more proficient at hand-coding my designs.
I looked at the pitfalls of the various prototyping methods I had tried and found that creating my prototypes in HTML meant that I could have my cake and eat it too.
I could take the things I liked about these pre-production methods and improve the things I didn’t. But I never bowed to the pressure of the community. I needed to arrive via my own conclusions.
The HTML prototype exposed usability issues straight away and avoided natural omissions that are often made when wireframing.
The process, as a whole, was becoming less time-consuming because small changes weren’t taking hours to rectify, and the code was completely reusable when it came to the production stage.
It also allowed me to perform a reasonable level of testing. For example, seeing how adding more content would affect the page and then making design considerations for those scenarios.
But most importantly, it showed the client exactly what they would get. The HTML prototype is a perfect tool for emotionally detaching the client from any crazy aesthetic they may have cooked up in their head.
It forces them to think objectively about the purpose of the website and the expectations of the user. It also creates a definitive point of sign-off, where you can say to the client – this is what you are going to get for your money. Anything else might cost you.
Show and Tell
My design process starts by listing out the information, actions, and user expectations of the various pages. This relies heavily on clear and direct communication with the client, in addition to some careful research.
Once I have done this, I will group the corresponding parts and prioritize these groups.
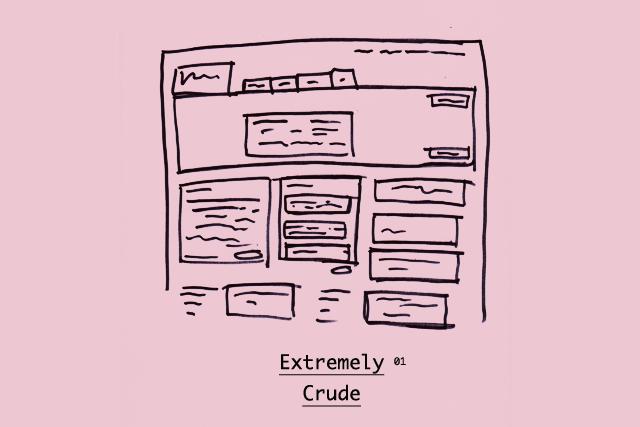
I then start to sketch, very crudely, until I have a well-balanced, structured starting point. I also, at this stage, begin considering the semantic structure. (Is this a section or an article? – you know, that old chestnut).
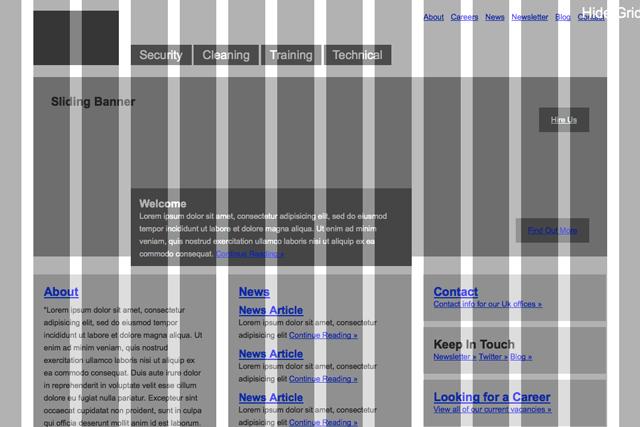
Now it’s time to crack open Coda and start building my prototype with HTML and CSS. I create the code exactly as I would if I were building the completed front end of the site, avoiding any shortcuts.
I often end up tweaking things once I’ve actually got them working. I’ll move things around to balance them and iron out the user experience until I am happy enough with the prototype to show it to the client.
How much detail you choose to go into with your prototype is completely up to you. The more detail – the longer it will take. The less detail – the more chance you have of running into problems when you come to build it.
But one thing you should always bear in mind is that HTML prototypes are butt ugly.
There’s no need to make them any less attractive than they already are. For this reason, I generally build mine to a grid, especially if the site wants to transition gracefully across different view-ports (responsive web design).
I won’t, however, bother with any color or typography considerations which I know a few people will.
The final stage is to show the working prototype to the client, collect their feedback and make any necessary alterations. Explaining the purpose of the wireframe to the client and managing their expectations is essential and is best done either over the phone or face-to-face.
Telling them that “a prototype is a rudimentary version of something designed to exhibit both form and function” probably isn’t your best line of attack, so remember who you’re talking to and tailor your explanation accordingly.
Sigh.
Make a coffee.
Cue a good few hours worth of unobtrusive dance music on Spotify.
You may now design
So there you have it, my HTML Prototyping Handbook for Web Designers. In truth, it’s more of a pamphlet, but I hope there’s enough here to inform your decision if you are interested in changing your workflow.
Whether you’ve used the same technique for years or just a couple of weeks, don’t be afraid to challenge it every once in a while, if only in the name of pursuing perfection, no matter how unobtainable it may seem.
Related Topics
Top