If you’re a graphic or web designer, you’ll know how important it is to have visually stunning text in your projects. Luckily, Photoshop is a powerful tool that can help you create intricate and eye-catching text effects that can be used for various purposes like branding, advertising, apparel design, logo design, or even web design.
To help you improve your Photoshop skills and create unique typography designs, we’ve curated a collection of tutorials that cover various techniques, including layer styles, blending modes, and filters. These techniques can be used to create stunning typographical effects like 3D, neon, metal, water, smoke, chocolate, and many more.
Each tutorial is easy to follow and includes step-by-step instructions to help you master the techniques. By the end, you’ll have a solid understanding of how to create stunning text effects that will impress your clients and audience. So, explore these tutorials and take your design skills to new heights!
You might also like our collection of text effect Illustrator tutorials.
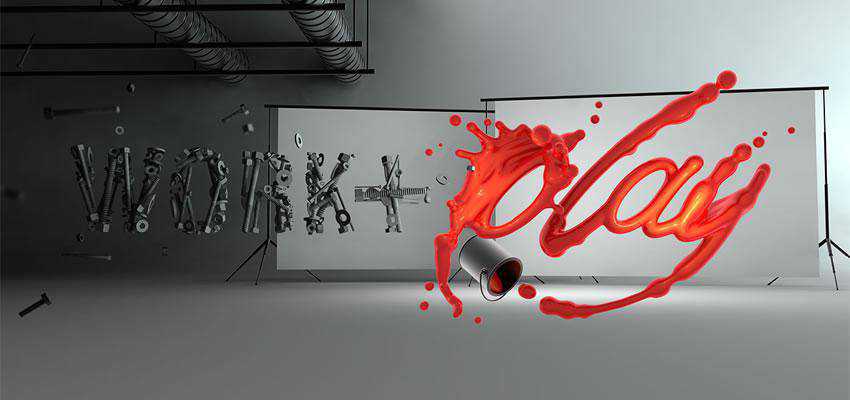
How to Create a Incredible Typographic Illustration
In this two-part tutorial, you’ll learn how to bring a simple proverb into a complex typographic illustration that achieves a level of realism.
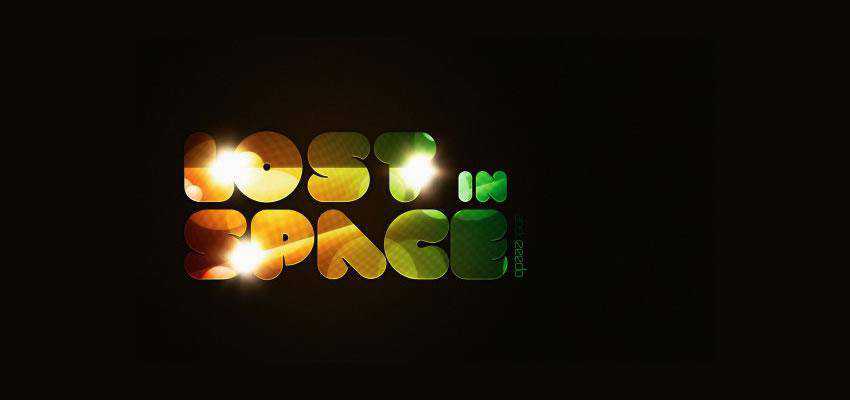
How to Create a Lost in Space Typography
In this tutorial, you will learn how to create an abstract composition with light effects and apply that as a texture of text.
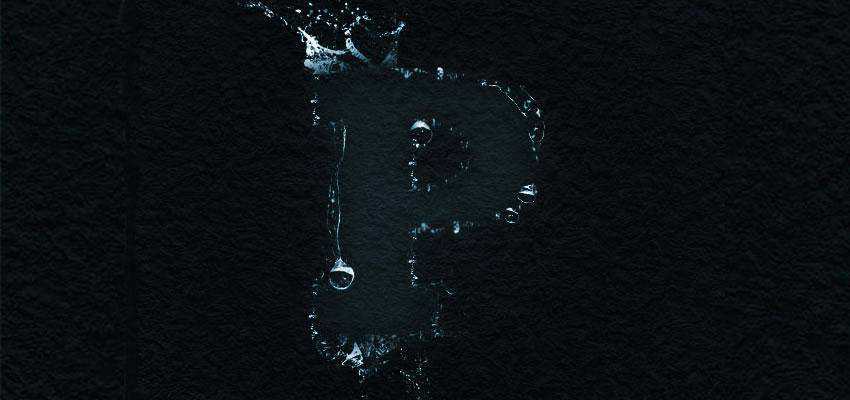
How to Create a Atmospheric Under-Water Text Effect
Here you will learn to create an atmospheric underwater text effect with just a few simple steps. You will learn how to extract water properly and manipulate it to fit your typography.
How to Create a Distressed Typographic Poster
Follow this step-by-step walkthrough of the design process for the ‘Spectrum’ poster. Starting with custom-made type in Illustrator, you’ll move the vector graphics into Photoshop for some distressing with Photoshop brushes, blending modes, and more!

How to Create Cool Water Effect Typography
In this tutorial, you will learn to create a fantastic water typography effect using stock photos, blend modes, and filters.

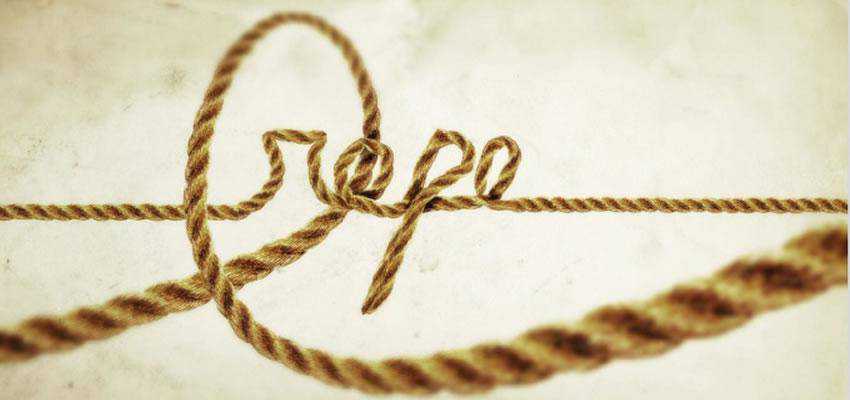
How to Create a Rope-Style Text Effect
In this tutorial, you will learn to create a text effect using a photo of rope and the Puppet Warp tool.
How to Create a 3D Typographic Illustration
In this tutorial, João Oliveira creates a 3D typographic illustration using initially Cinema 4D for building the 3D, followed by Photoshop for the post-production.
How to Create a Number Candles Text Effect
This tutorial explains the techniques for creating the 3D numbered candles below without using any 3D tools. It will then guide you through the other sections of shaping the candles, adding lights and shadows, and finally, placing the candles on top of a cupcake.

How to Create a Electrified Metal Text Effect
In this tutorial, you will learn the steps to recreate the Electrified Metal Text Effect below. It covers several selection techniques, as well as how to use the right textures to create this unique text effect.
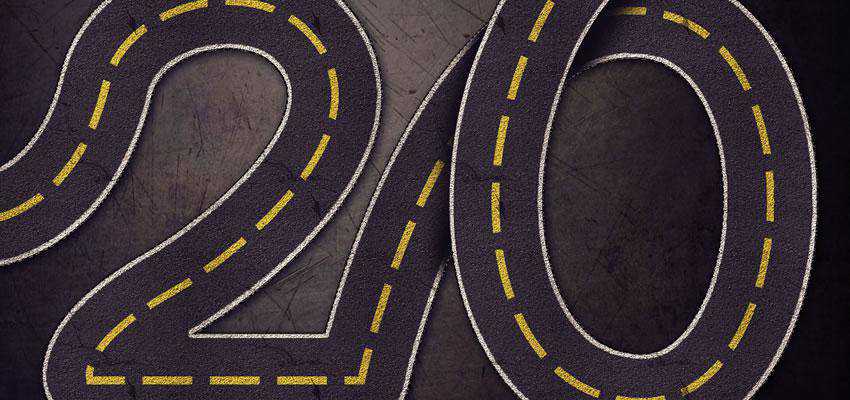
How to Create a Striped Road-Inspired Text Effect
This tutorial will show you how to use the Pen Tool, along with some Brushes and Blend Modes, to recreate the striped road-inspired text effect below.
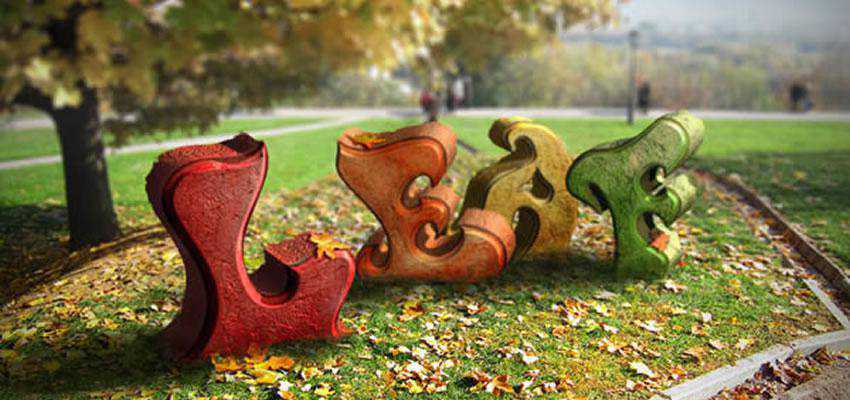
How to Create an Autumn-Themed 3D Text Effect
This tutorial will explain Photoshop’s 3D features to create the below autumn-themed 3D text effect.
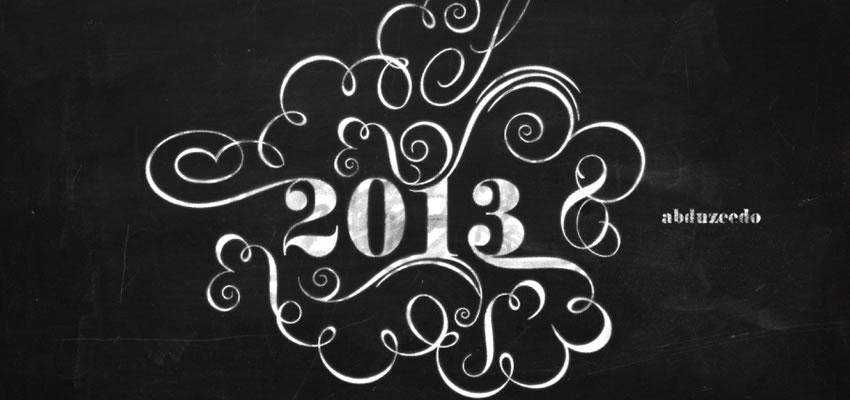
How to Create Ornamental Chalk Typography
This tutorial will show you how to create stylish ornamental typography and then apply a chalkboard effect using Adobe Illustrator, Photoshop, and some vector ornaments.
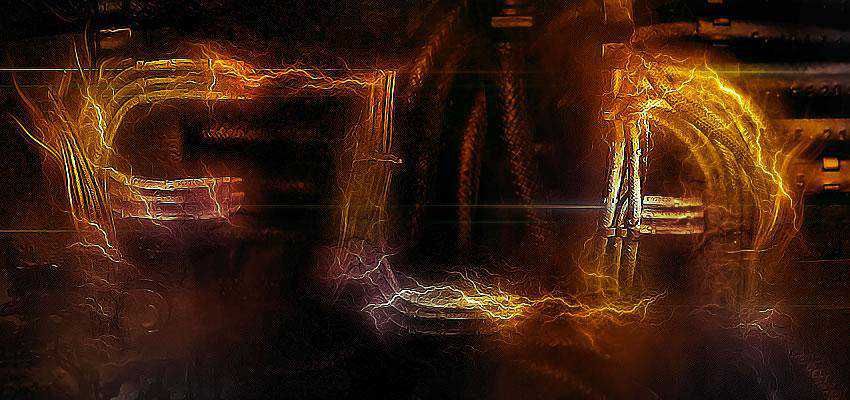
How to Create a Magical Fire Energy Text Effect
In this tutorial, you will learn the steps to create the below text effect, tackling painting, layer blending, and image adjustments.

How to Create a Valentine’s Day 3D Text Effect
In this tutorial, you will learn how to combine Photoshop and Filter Forge to create a wood-textured 3D text effect with a simple red glass heart.

How to Create The Great Gatsby Art Deco Style
In this tutorial, you will learn how to create an Art Deco image and text effect based on the poster of The Great Gatsby movie, using Illustrator and Photoshop.

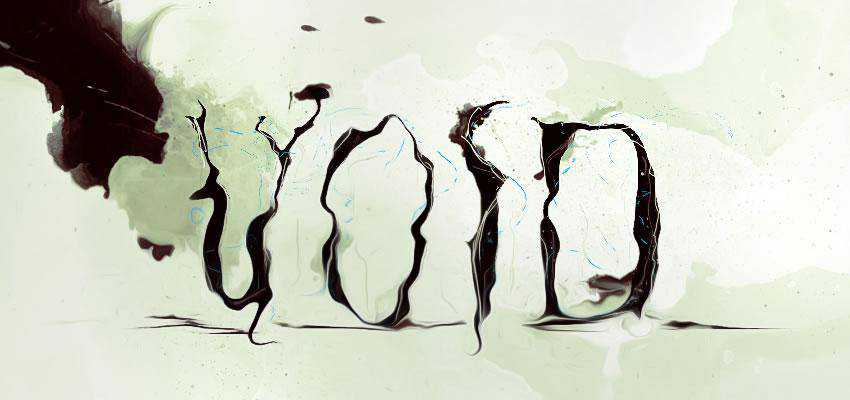
How to Create Fluid Typography
In this Photoshop tutorial, using custom brushes and the liquify tool, you will learn how to recreate the beautiful fluid typography you can see below.
How to Create a Scrabble Tiles Text Effect
This tutorial will show you how to create your own scrabble tiles set from scratch so that you can use them anytime with any background.

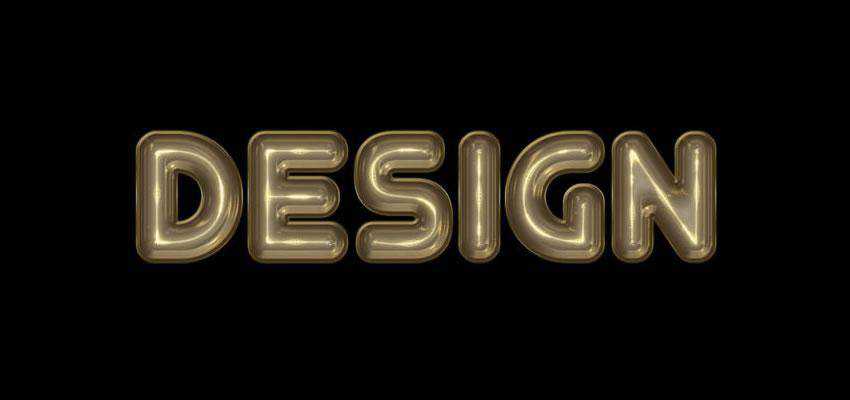
How to Create a Glowing 3D Text Effect
In this tutorial, you will learn how to combine Photoshop with Filter Forge to create a glowing 3D text effect.

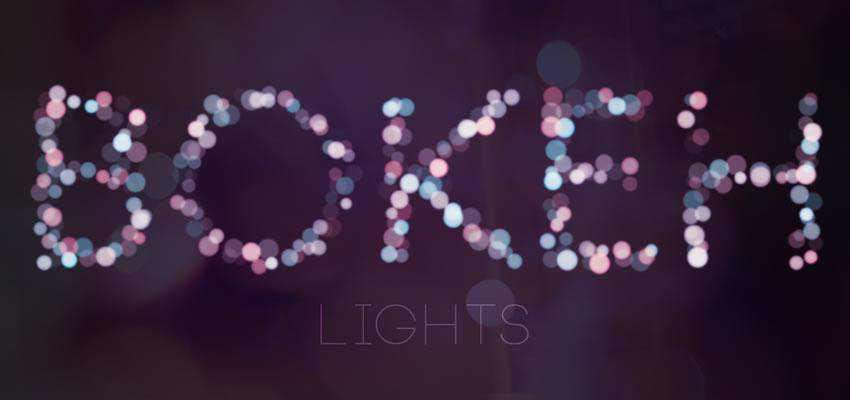
How to Create a Simple Bokeh Text Effect
This tutorial shows you an easy method for creating a beautiful bokeh text effect, using simple brushes and layer effects.
How to Create Old Signage in Photoshop
In this tutorial, you will learn how to create an old signage text effect using stock photos. As a bonus, you will also create a simple animated GIF.
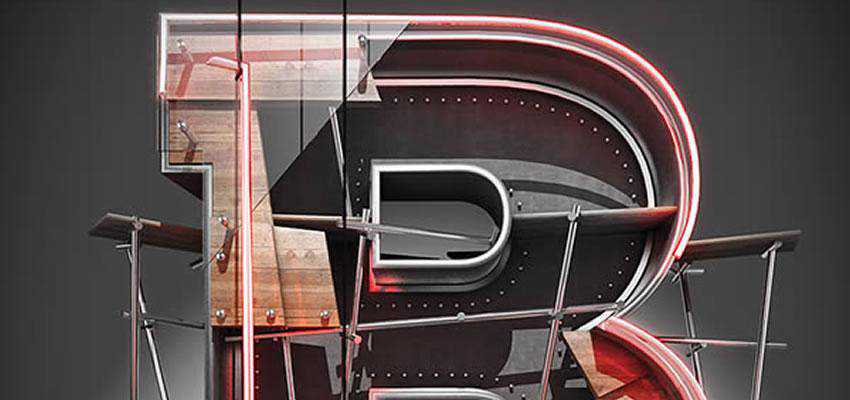
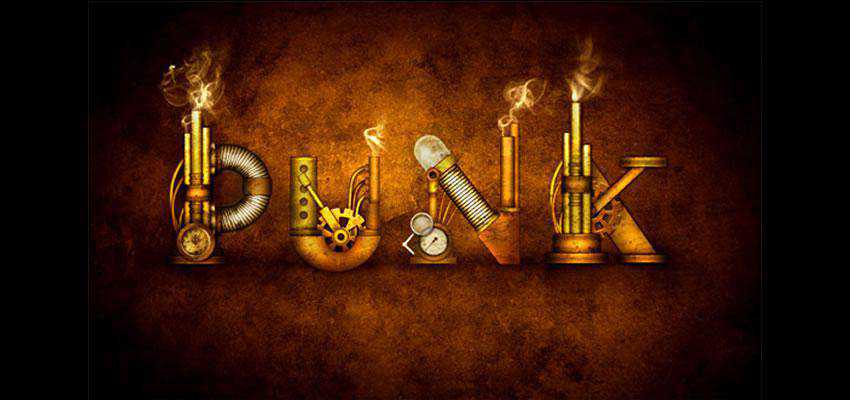
How to Create a Steampunk Type Treatment
How to Create the Dark Knight Rises Stencil Effect

How to Create an Abstract Geometric Mosaic

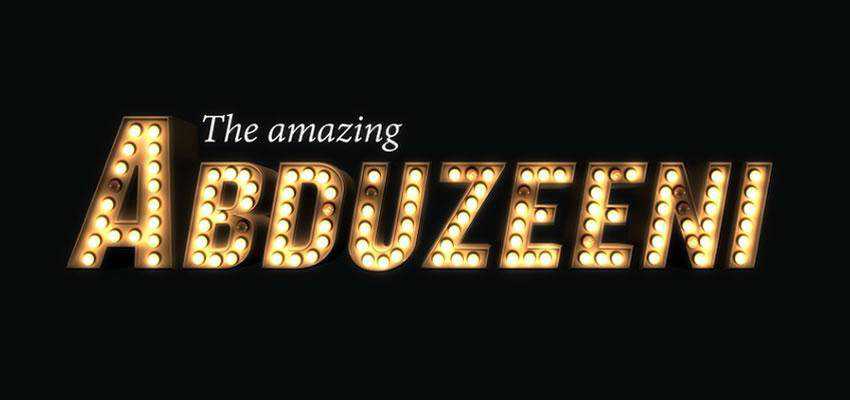
How to Create a Light Bulb Inspired Photoshop Text Effect
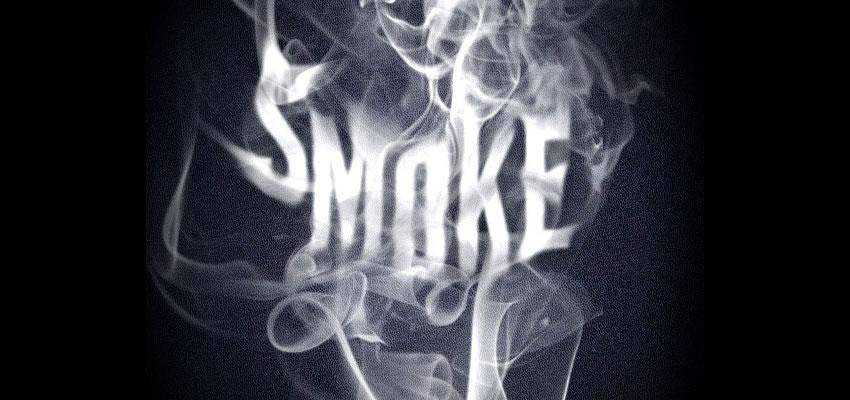
How to Create a Smoke Type Effect
More Photoshop Tutorial Collections
Related Topics
Top