I like to think of the typical WordPress website as a collection of parts. Themes, plugins, and custom code can be combined to power virtually any type of site.
But, in most cases, these various pieces don’t necessarily work together. That is, they each serve their own purpose independently of one another. Unless they’re tied into the same ecosystem (a WooCommerce extension, for example), they can usually be changed without causing a domino effect.
That has both positives and negatives. On the plus side, it’s possible to add or remove functionality at any time. But it also means that getting things to work in tandem can be difficult.
It’s a challenge for developers. There are many scenarios where you may want user actions in one plugin to also trigger a response in another. Unless these features are intentionally built into a plugin, it may require building that functionality from scratch.
That’s where the power of automating WordPress comes into play. There are now tools specifically designed to trigger a chain reaction among multiple plugins and third-party services. Best of all, they can be configured with relative ease.
If that sounds like something that could change your life (or at least your website), read on! We’ll introduce you to some WordPress automation tools and basic examples of what they can do for you.
WordPress Automation Plugins
The first step involves choosing a WordPress automation plugin. This will serve as the glue that links your site’s various plugins and services together.
There are a couple of compelling options we’ll focus on. Each has a free version that includes plenty of possibilities. If you’re looking for something more robust, commercial versions provide advanced features and wider compatibility.
Before you choose, be sure to review what’s included. While both options have similarities, there may be some key differences that will determine the best fit for your situation.
AutomatorWP
AutomatorWP comes loaded with integrations for popular plugins such as WooCommerce, BuddyPress, Gravity Forms, LearnDash, and Restrict Content Pro – among many others. In addition, you can tie in with service providers like HubSpot, Twilio, Zapier, and Zoom.
Note that integrations are limited on the free version of the plugin. Premium add-ons are available, which can be purchased individually or as part of a package deal. They expand upon the types of tasks (a.k.a. “triggers”) available in your automation workflow.
Uncanny Automator
In addition to the plugin integrations listed above, Uncanny Automator works with the likes of Easy Digital Downloads, Elementor, MemberPress, and The Events Calendar. Third-party services include Facebook, FluentCRM, and Twitter.
The free version includes over 100 automation triggers and actions. More are available via the pro version. Note that there is no a la carte option– you’ll need to buy the pro version to access the advanced functionality.
Creating a Few Basic Automations
Now that we know a bit more about both AutomatorWP and Uncanny Automator, it’s time to put them to work. We’ll use them to create a couple of automations that reflect common use cases.
But first, a little background on how things are put together.
How Does It Work?
While each plugin uses slightly-different terminology, the process for adding automation to your website is essentially the same.
Both have a similar back-end UI for creating automated functionality. AutomatorWP calls them “automations,” while Uncanny Automator refers to them as “recipes.” It is possible to have multiple automations/recipes on your site.
Either way, these configurations have two components:
Triggers
A trigger is the initial step in the process when a user performs a specific task. For example, common triggers could be when a user enters a comment on a blog post or purchases a product. Triggers can be set up for either logged-in or anonymous (logged-out) users.
Actions
An action is what happens after the trigger has been completed. Let’s say a user has joined a BuddyPress group on your website. You could create an action that automatically emails them a welcome letter or adds them to a mailing list.
It’s also worth noting that a given automation/recipe can contain multiple triggers and actions. In some situations, you can even set a sequence for them.
Example #1 (Uncanny Automator): When a Customer Purchases a Specific WooCommerce Product, Add Them to a BuddyPress Group
Our first example will tie both WooCommerce and BuddyPress together. When a customer purchases the “Beanie” product from our fictional store, we’ll also add them to our “Fashion Forward” BuddyPress user group.
We’ll use Uncanny Automator to set it up. Here’s how we did it:
1. Inside WordPress, navigate to Automator > Add New.
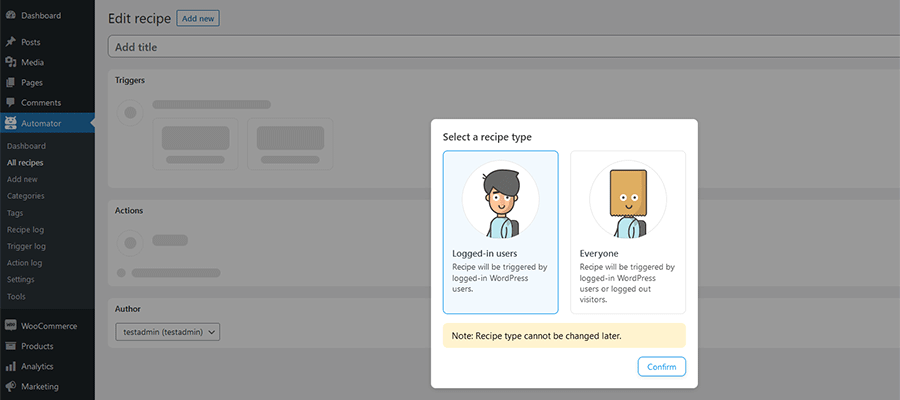
2. Uncanny Automator will ask you to select a recipe type. In this case, we’ll want to choose “Logged-in users.” Click on “Confirm”.
3. Give your recipe a name – in this example, we went with: “Add Beanie Buyers to the Fashion Forward BuddyPress Group.”
4. Under the “Logged-in triggers” area, click on WooCommerce.
5. Now, you’ll see a list of possible triggers. Choose: “A user completes, pays for, lands on a thank you page for an order with a product.”
6. Next, Uncanny Automator will ask for a Trigger condition. Select “completes” and click on “Save”.
7. Here, we’ll choose the product we want to target. From the list, select “Beanie” and click on “Save”.
Now that our trigger is set, it’s time to move on to the Actions portion of the recipe.
8. Click on “Add action”.
9. From there, click on BuddyPress.
10. Select “Add the user to a group” from the action list and click on “Save”.
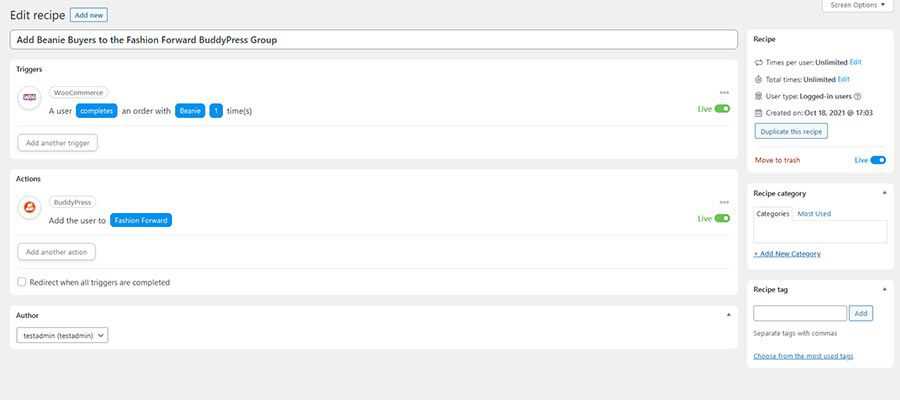
11. Also, be sure to change the status on the upper right of the page from “Draft” to “Live”.
When completed, the recipe should look similar to the image below.
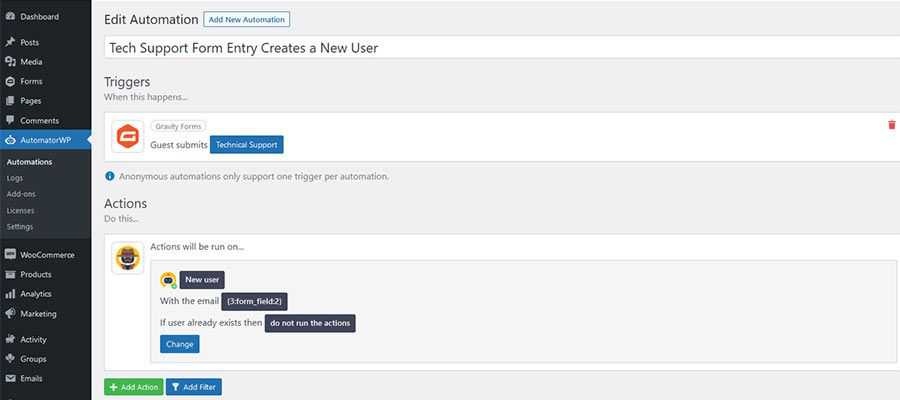
Example #2 (AutomatorWP): When a User Submits a Gravity Form, Create a New WordPress User
Our fictional website has a technical support form (powered by Gravity Forms) that users can submit to get help. If that user doesn’t have an account on our site, we can use AutomatorWP to create one for them.
This automation requires us to know the ID numbers of the fields in our Gravity Form. That can be found by clicking on specific fields within the form editor’s UI.
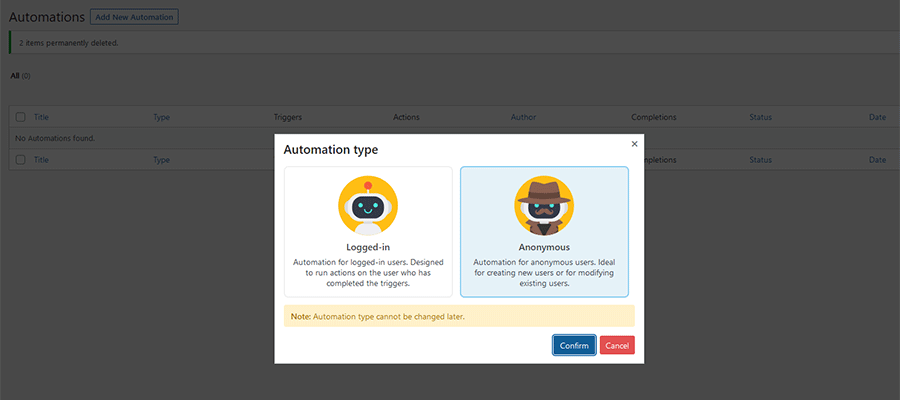
1. Inside WordPress, navigate to AutomatorWP > Automations. Once on the Automations screen, click on “Add New Automation”.
2. AutomatorWP will ask you to select the automation type. Select “Anonymous” and click on “Confirm”.
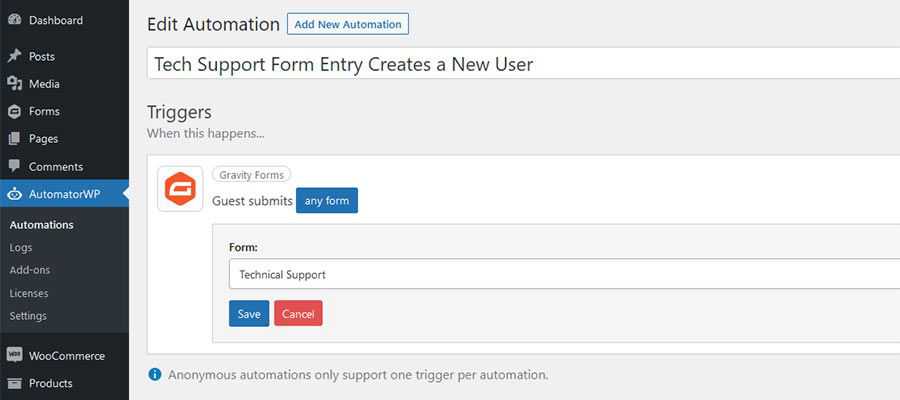
3. Give your automation a name – in this example, we went with: “Tech Support Form Entry Creates a New User”
4. In the Triggers area, click on Gravity Forms.
5. Choose “Guest submits a form” from the list of triggers. By default, the trigger will work with any form on our site. To change to a specific form, we clicked on “any form” and selected ours (Technical Support) from the list. Click on “Save”.
Now that our trigger is set, it’s time to move on to the Actions portion of the automation.
6. In the Actions area, click on “New user.”
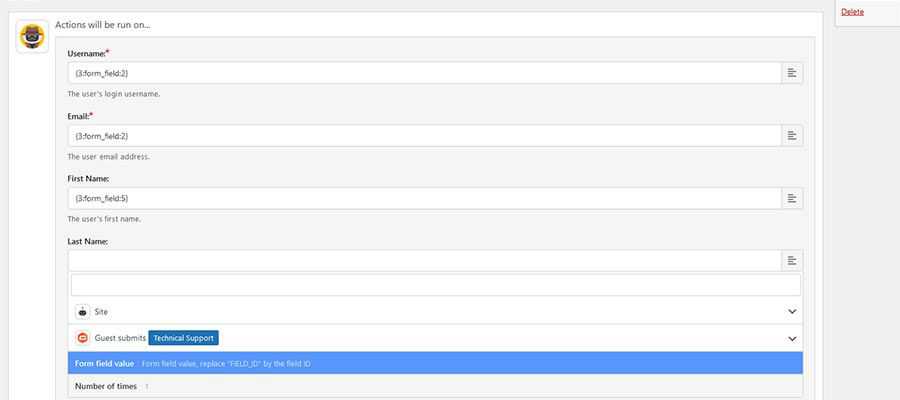
7. We can now fill in portions of the new user’s profile with fields from our form (via the Guest submits a form action). As we mentioned, this requires us to know the ID number for the various fields. In this case, we have fields for the user’s first and last name, along with their email address.
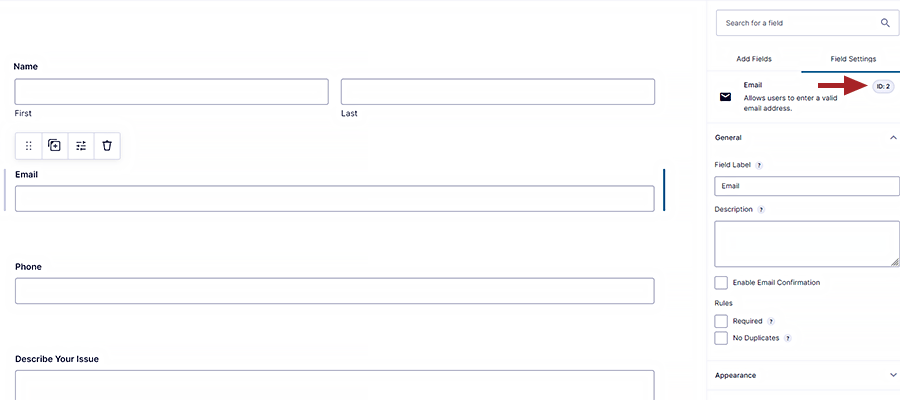
Our form’s Email field (ID: 2) will be used to populate both the Username and Email fields in the user profile.
For the user’s name, we’ll use First Name (ID: 5) and Last Name (ID: 6) from the form.
8. There are a few more options within this action we’ll want to address:
The default user role is “Subscriber,” but we can change that in the Role setting if needed.
We’ll turn on the Send User Notification setting. This will send an email to the new user and provide a password reset link.
Then, we’ll set What to do if the user already exists: to “Do not run the actions”.

9. Click “Save” to save the new automation action.
10. Finally, click “Save & Activate” to put the automation to work.
When completed, the automation should look similar to the image below.
Making WordPress Plugins Work Together
WordPress automation plugins can turn an otherwise time-consuming process on its head. With just a few clicks, it’s possible to create some seriously useful functionality.
And while some of the more advanced options require commercial software, it may be well worth the investment. Think of how much time and effort it would take to create these features from scratch. The convenience alone is worth the price.
Finally, there’s an easy way to make your site’s WordPress plugins work together. Experiment and see how it can help improve your workflow.
Related Topics
Top