WP Fastest Cache is a versatile plugin that helps decrease the page load time of your website by creating quickly rendered HTML files that are stored and accessed by subsequent visitors.
Since a WordPress website is rendered through PHP and MySQL it requires RAM and CPU usage each time the page is requested from the server. This slows down the load time and places more effort on the user’s computer or device, as well as the database. However, with a cache system, the page is rendered one time and then stored as a static HTML file, thereby reducing the load time for each new visitor.
How WP Fastest Cache Works
After installing the plugin, start digging into the customization settings by clicking on the WP Fastest Cache link in the menu bar.

This directs you to the Options page, where you will really begin to utilize the plugin’s features. We will focus on each one of the tabs in the option menu.

1. Starting with the first tab, Settings, we will start implementing the caching system. Check the first box, Enable, to allow the plugin to start working on your site.
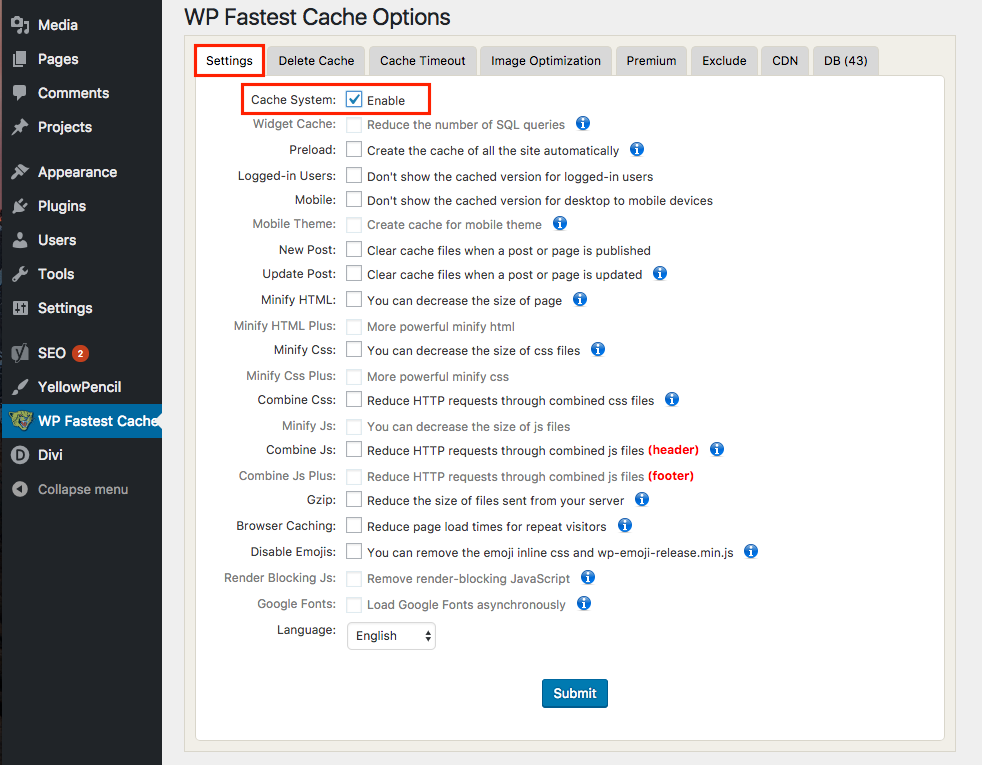
2. The next option, Widget Cache, is grayed out, which means it is not available in the free version of the plugin, in order to use any of the premium options, you will need to upgrade to the paid version. We will focus on the free options in this tutorial.
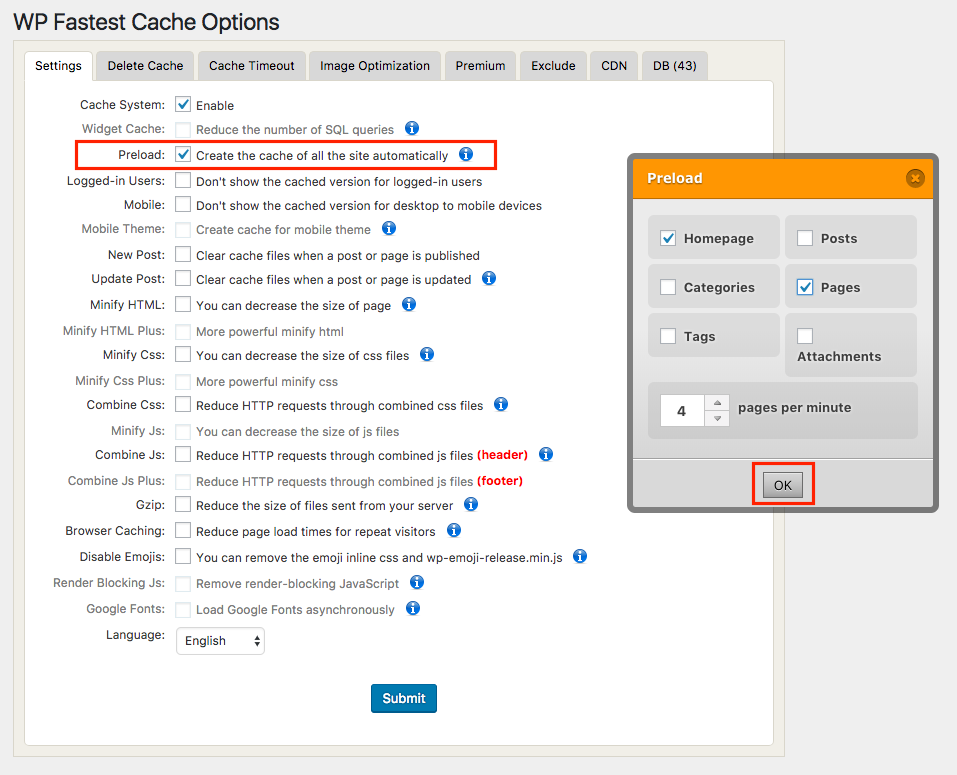
3. The Preload option will generate the page caches automatically, instead of when someone visits the site. Choose which features you want to automatically cache and click OK.
4. The next option allows you to block the cached version for logged-in users and will cause the page to load naturally.

5. After that, we’re also given the option to block the cached desktop page when someone accesses the site from a mobile device.

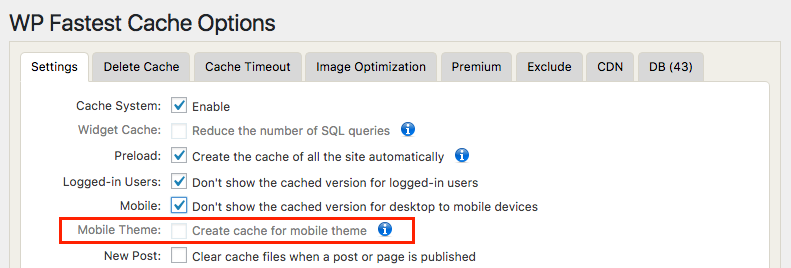
6. The subsequent Mobile Theme would allow you to cache the mobile version, but is available only to those who purchase the premium version.
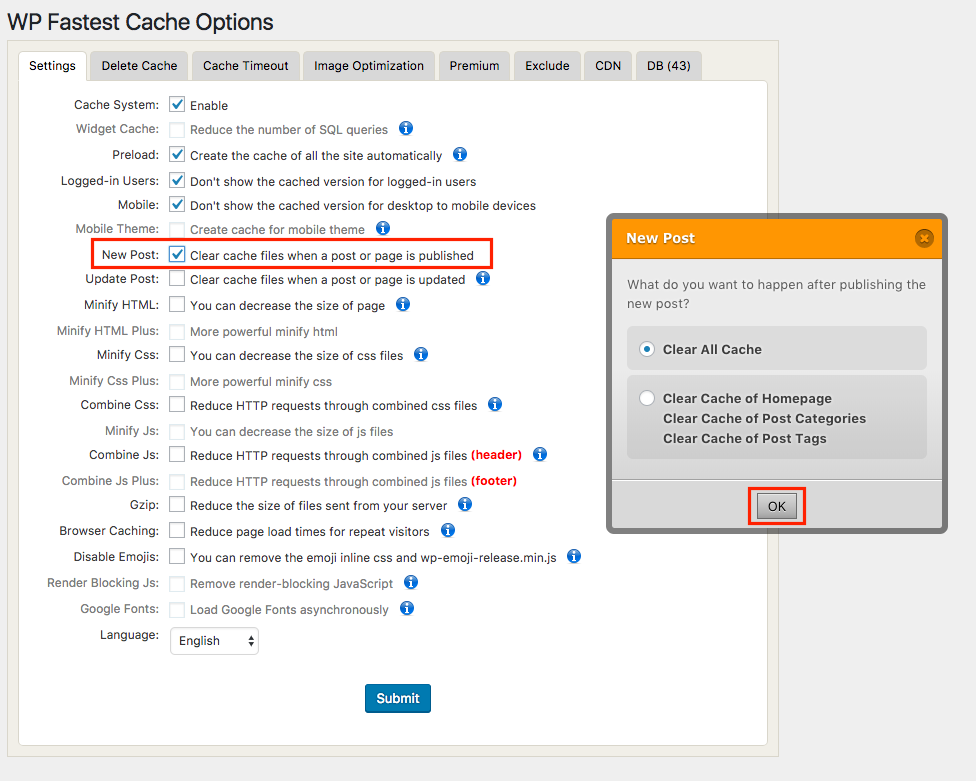
7. New Post allows you to choose which cache files to clear when new content is published on your website.
8. Similar to the previous option, Update Post allows you to choose which cache to clear when content is updated on your website.

9. Minify HTML allows you to decrease the amount of HTML that composes your cache file, thereby also decreasing the load time for your visitor.

10. Minify CSS actually decreases the size of your CSS files to make page rendering faster.

11. Combine CSS will integrate multiple CSS files into one file in order to reduce the number of HTTP requests and decreasing load time.

12. As with the CSS, the Combine JS option will combine multiple JavaScript files into one file for fewer requests from the server.

13. Gzip compresses the size of files and resources being sent from the server, allowing them to load faster.

14. Browser Caching enables frequently used files (such as CSS and images) to be stored in a visitor’s web browser so the resources will not have to load each time the visitor views the page.

15. The last option on this page is Language. This will only change the language in which the options menu appears for this plugin, not for your site as a whole.

Choose Turkish, for example. Only the words contained in the plugin’s options pages will be changed.

English is the default. Make your selection from the dropdown menu, then click Submit to save the changes you’ve made on this page. You’re well on your way to optimizing your site with a cache system.
Next, let’s check out the second tab in the menu. Delete Cache.
Delete Cache
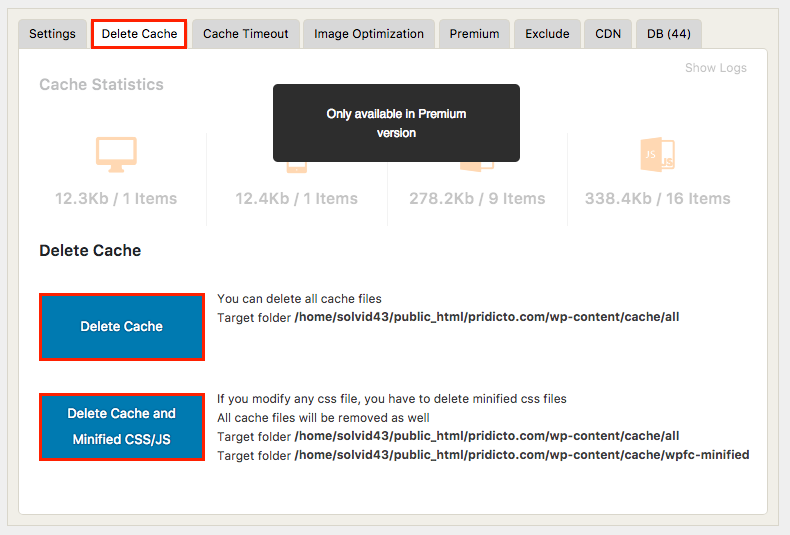
The grayed out features are only for premium subscribers, but the two main options at the bottom are still available.
- Click on Delete Cache to delete every cached file.
- Choose Delete Cache and Minified CSS/JS to delete all caches as well as the minified CSS and JS files created in previous options. The minified versions of CSS and JS are kept in a separate file on the server that the rest of the cache, so choose this second option to delete those as well.
That’s it for this tab. Not bad, right? Let’s move on to the next tab, Cache Timeout.
Cache Timeout

1. In this tab, we have the chance to create Timeout Rules. Click Add New Rule to bring up an options box.

The first option in the box is If REQUEST_URI. Click to view a dropdown menu with four choices: All, Home Page, Starts With, and Is Equal To. Choosing All will cover every URI requested by visitors, while the following three options will limit the timeout rule to either the Home Page or a URI Starting With or Equal To the value you type in the text box next to the menu.
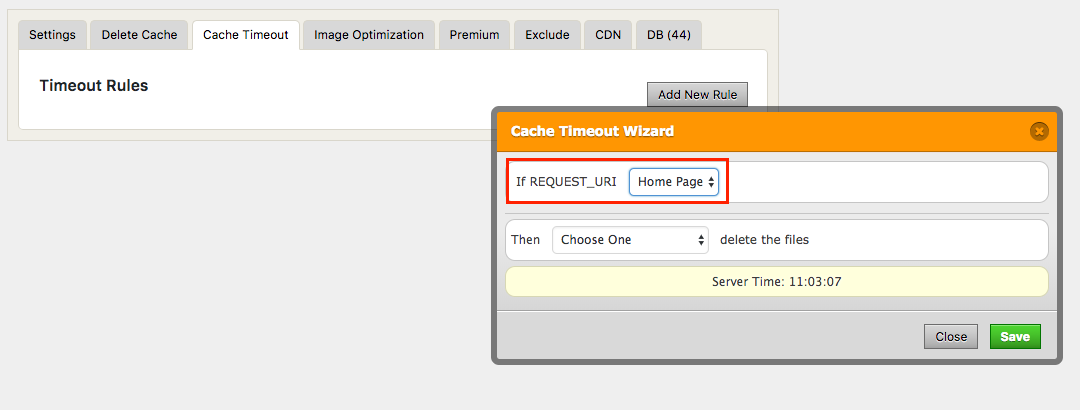
Once you have chosen the URI type, choose what happens Then from the dropdown menu. The options in this box are for the time period in which the cache is deleted.

Choose how frequently the cache should be timed out, and then click Save. You will see your new timeout rule appear.

Create as many rules as you want in order to cover different areas of your website. Choose the type of URI (whether homepage or starting with a specific URL) and choose the frequency in which the cache is deleted for that area.

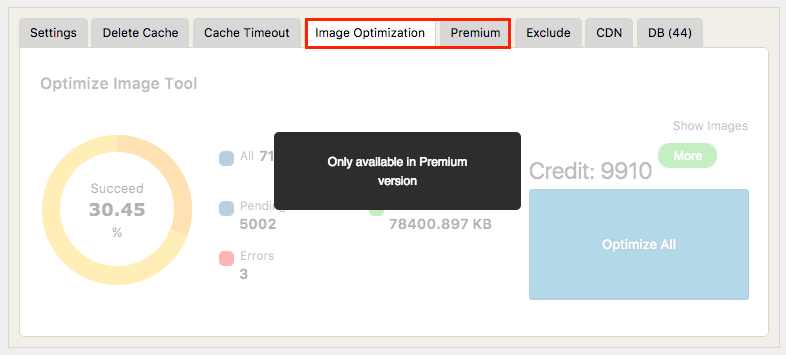
Great, that was the Timeout Rule section. Let’s move on to the next tab. Notice that Image Optimization and Premium contain content only available to premium subscribers.
We will move on to the Exclude tab. The first option here is to exclude certain pages from being cached.
Exclude
1. Notice there are two default rules to exclude the wp-login.php and wp-admin pages. These cannot be edited or deleted.
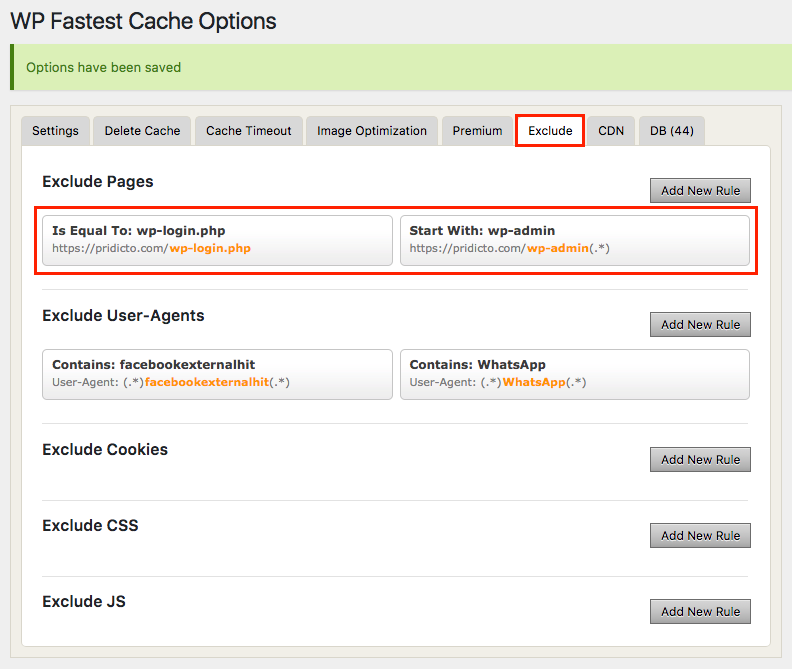
2. Click Add New Rule to create a new rule.

3. Select the type of page, content or URI you would like to exclude, and click Save.
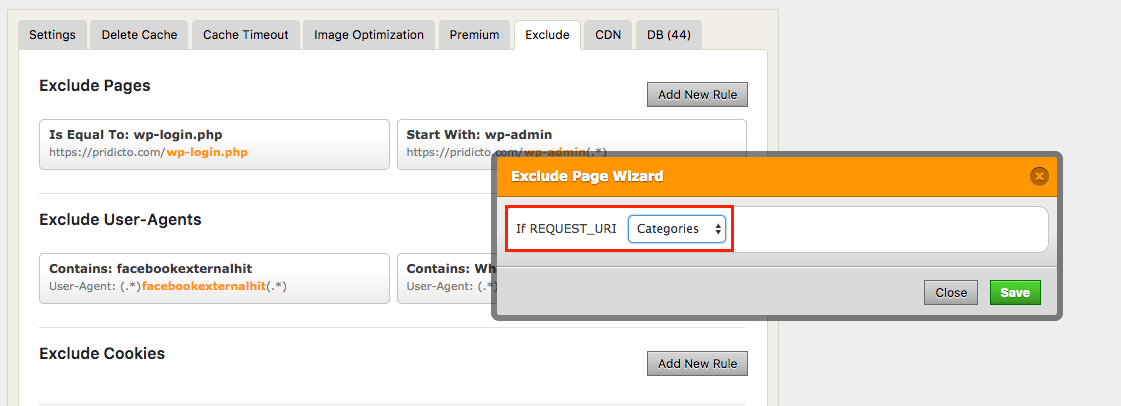
4. You will see your new exclusion rule appear. Any rules you create can be edited or removed by clicking on them.

5. The next section to which you can add rules is the Exclude User-Agents area. Again, notice two default rules that cannot be changed or removed. Choose Add New Rule to define a rule.

This option allows you to create a rule that excludes caching for a certain type of user agent. Type your content and click save.
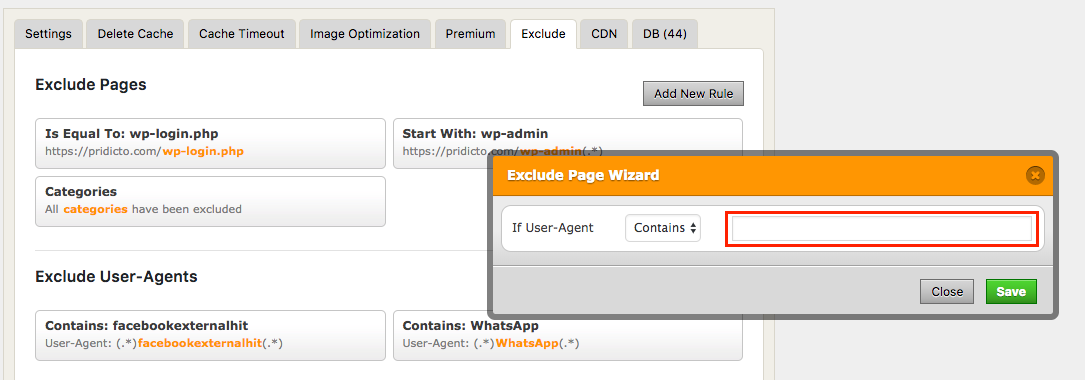
6. The last three options allow you to exclude specific cookies, CSS or Javascript. Use these in the same way by clicking Add New Rule, choosing the excluded URI and saving the changes.

You should now have a good handle on the types of files that are being cached, minified or combined, as well as how to exclude certain types of pages, content or user agents from utilizing the cache system.
CDN
Of the two tabs left to explore, one is available only to premium subscribers. So, we will take a brief look at the last tab we can utilize. Click on the CDN tab.
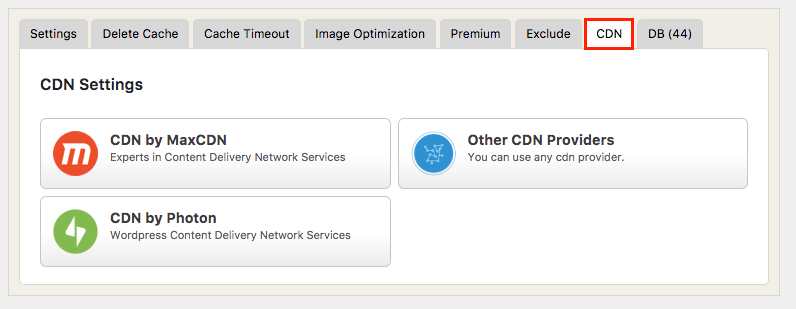
In a nutshell, CDN, or Content Delivery Network, is a system of storing your cached files in different geographic locations to minimize the amount of time it will take for a website user in another country to access the files.
There are different CDN providers which can help deliver your content speedily. If you have an existing account with any of the providers listed above, click on it to get set up. If not, it’s easy to create an account with MaxCDN to get started using this additional feature.
Related Topics
Top