The practice of Search Engine Optimization has been constantly evolving for as long as search engines have been around. While every search engine marketer will implement different strategies and tactics, a results-driven SEO campaign generally boils down to a couple of key things:
- Having an easy to use website that is optimized for SEO best practices
- Creating high-quality, engaging content
- Building authority with links, citations and brand mentions from around the Internet
For the purposes of this article, I’m going to focus on on-page tactics. Keep in mind, these are the same tactics and this is the same approach that we take to our on-page optimization campaigns at Proper Noun. So what does “on-page optimization” really mean?
At a high level, on-page optimization is the process of configuring a website so that Google will index it for specific keywords. This involves improving the website’s content, reconfiguring its code, and refining the website user experience.
But if you’re here, you’re probably looking for a bit more information than that. Let’s take a look at what goes into implementing a strong on-page optimization strategy.
Getting Started With On-Page Optimization
Run A Baseline Audit
Before getting started with the actual website optimization, the first thing you should do is run a baseline audit of your website. There are a number of great tools, both free and paid, that you can use for your audits.
Website Page Speed Test
GTMetrix
Start by testing your website page speed. Whether or not you’ve optimized this before, it’s important to revisit your page speed during this process. I like to use GTMetrix to run website page speed tests.
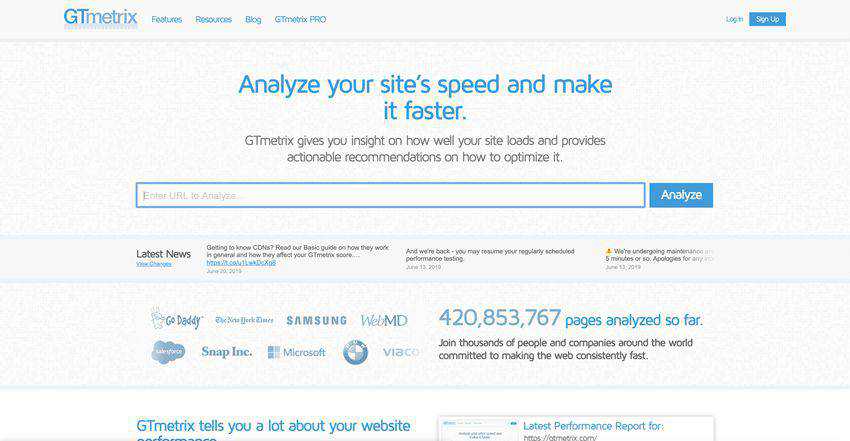
Head over to GTMetrix.com and enter your website URL into the “URL to Analyze” input. The test will run for a minute or so and then will give you two letter grades along with some website size information.
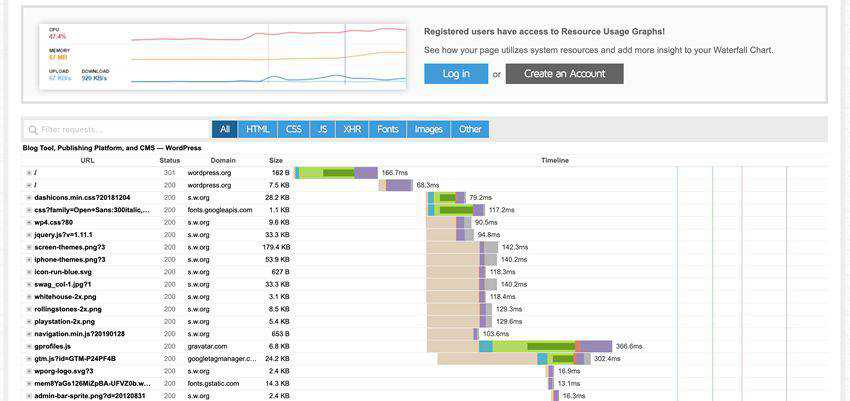
As far as the page speed results go, here are the most important metrics to consider for your testing in order of importance.
- Fully loaded time
- Time-to-first Byte under the Waterfall tab
- Total Page Size
- Total Requests
- PageSpeed & YSlow Page Score
In my opinion, the two most important factors are going to be your fully loaded time and the time-to-first byte. If your website fully loads in 1 second and you have a 100ms time to first byte, it doesn’t really matter what your YSlow score is.
On the other hand, if you have a 100% YSlow score but have a 6 second fully loaded time and 3 second time to first byte, you’re going to be at a disadvantage in the search rankings.
Once your GTMetrix scan finishes, download your results as a PDF and save them to a folder on your computer. You’ll come back to reference this report later.
Google Lighthouse
Google Lighthouse is another excellent tool that will test page speed, user experience and more. Google Lighthouse is available via Chrome’s DevTools.
Lighthouse will allow you to test your website’s page speed, usability and on-page SEO factors for both desktop and mobile experiences. The tool will also let you test your site with various connection settings, highlighting the user experience and page speed differences between a high-speed connection and a slower 3g connection.
Google Analytics & Search Console
Make sure that your website is connected to both Google Analytics and Search Console (formerly, Webmaster Tools). Each of these platforms performs a different, yet equally important service.
Google Analytics will be responsible for reporting on the amount of traffic your website receives and where it’s coming from. It will allow you to segment this traffic by secondary dimensions and also to track goals and events. Google Analytics will also do things like segment your traffic channels. This will allow you to easily see how much of it comes from organic traffic vs. paid traffic.
Google’s Search Console tracks details about how your site is interpreted in Google Search. It will tell you how many of your pages are indexed in Google, whether or not your website has any spam or mobile errors, the status of your sitemap, Core Web Vitals performance, and much more. It is a must-have tool to tell you whether your website is “SEO-friendly”.
On-Page SEO Audit
The next thing you’ll want to do is run a full audit of your website for on-page optimization. The audit will analyze the content of your pages, as well as various website configurations.
SEOSiteCheckup.com
SEOSitecheckup.com runs a pretty comprehensive audit for specific pages and will also give feedback on website configuration issues. Once you’ve finished this audit, save it to a file.
Neil Patel’s SEO Analyzer
Neil Patel is a top digital marketer and SEO professional who creates a ton of free content on just about everything digital marketing related. His free website analysis will provide some great insight into keywords, top pages, backlink opportunities and more.
WooRank
WooRank is another free, easy-to-use SEO analysis tool. It will provide you with a baseline score, as well as a variety of issues, errors, required fixes, and more. WooRank does offer a paid software, but the auditing tools are free to use.
SEMRush Website Audit
The SEMRush website audit will run through up to 100,000 pages on your website and test for a huge array of issues, errors, and warnings. As far as SEO audit tools go, this one is my favorite by far. SEMRush has a higher price than SERanking, but they do let you register for a free account to run a basic audit.
Save all of the audits you’ve run to a new project directory on your computer, you’ll be coming back to these later. Once you’ve finished your initial audits, you can now get started with on-page optimization.
Install A Trusted SEO Plugin
For the purposes of this article, I’ll be writing from the standpoint of optimizing a WordPress website. If your website uses a different CMS, static files or does not use a CMS at all, you can implement the strategies discussed manually.
If you’re running WordPress, the first thing you’ll want to do is install some sort of WordPress SEO plugin. I personally prefer Yoast SEO, however, I know that many people also like All-In-One SEO. If you’re running another platform like Magento, BigCommerce, or Shopify, there will be plenty of alternative extensions available to help with on-page optimization.
Installing a plugin or extension to assist with on-page optimization is important for a couple of reasons.
- WordPress does not give you control over the meta description. The meta description is crucial when it comes to having a properly optimized website.
- Plugins give you a variety of tools that make optimization faster. For example, the ability to set fallback descriptions and fallback titles for pages, posts, and products.
- Plugins will generate a number of additional necessities such as a sitemap, schema data, and snippets.
Once you’ve installed the plugin of your choice it’s time to get started. For the purposes of this article, the remainder of the instructions will be focused on using Yoast SEO, but you can apply these same strategies and tactics with almost any SEO plugin.
Focus Keywords & Contextually Related Keywords
Before starting the optimization process for your pages and posts, it’s important to understand what focus keywords and contextually related keywords are.
A focus keyword, or primary keyword, is the keyword that you plan to rank your page for. When choosing a focus keyword, there are a few things that you should consider.
First, what is your page about? You should typically be able to boil the main idea down into a keyword consisting of one to three words. In some situations, you may simply just want to choose this term as the focus keyword. You can also use this general keyword to find less competitive, long-tail keywords.
To find long-tail keywords start by running your starting keyword through a keyword suggestion tool. The generated list should include metrics like search volume, keyword difficulty, and suggested CPC value. If you don’t have a preferred tool, you can use the Google Keyword Planner for this.
Go through the list and look for any keywords that have a combination of adequate search volume, a relatively higher CPC value to the list, and relatively low keyword difficulty to the list. No one keyword will be the best result for all of these metrics, so use your best judgment to pick the best option.
A contextually related keyword is one that relates to your focus keyword within the context of the content. For example, “WordPress” and “web hosting” could be contextually related keywords and “WordPress” and “content management system” could be contextually related keywords. It would be dependent upon the overall content of the article.
A great way to find contextually related keywords without the assistance of a tool is to start by performing a Google Search for your focus keyword. Take a look at the top 10 results and pick 3-5 that are most similar to your content. Now, you should scan the content and look for any terms or themes that are used across multiple articles. Save any terms that you find so that you can use them in the content you create.
Start Optimizing Pages & Posts
When optimizing a website, I like to start by creating a spreadsheet of all of the pages and posts I’ll be working on and picking a focus keyword for each of them. While some may view this as extra work, I’ve found it helps improve overall efficiency.
Optimize Page Titles
The first thing you’ll want to do is optimize your page meta titles. Start by ensuring that every page has a unique, descriptive title.
Before updating each page or post individually, I like to set up a well optimized fallback title first. Generally, the best template for a fallback title is something like [Post Title] - [Website Name/Brand Name].
Using this fallback structure will ensure that your page titles remain unique and that they will be a bit different from the h1 text. It also doesn’t hurt to make sure your website is well branded with your name, business name or brand name.
In some cases, like on an e-commerce category page, you may want to include one or two additional words. For example, “Shop [Product Brand Name] Products - [Website Name]“.
Now, I’ll use the Yoast SEO bulk title optimization tool to individually optimize as many or all of your existing posts and pages. You will want to include the focus keyword for that specific page in the title whenever possible. If the page does not have a specific focus keyword, you can just go with a concise “main idea” keyword.
Make sure to also include the business name or website name as long as the title does not exceed 60-70 characters. You can also separate the focus keyword from the website name using a number of characters. Personally, I prefer using a pipe (|) as a separator, but, dashes (-) and colons (:) work too.
Optimize Meta Descriptions
Having a well-optimized meta description is crucial if you want to rank a page in the search engines.
The meta description is the extended text that will be displayed just beneath the title of the page in the search engine results. That means that this block of text will be the first thing a potential user sees when deciding on whether to visit your website.
Each meta description should be unique, it should clearly and organically explain the content of the page, and it should not exceed ~160 characters. Most importantly, it should also include your focus keyword.
Use the keyword organically, just as you would in a sentence or statement, and only use it once unless necessary. You should also stay away from forcing additional keywords into the description if they don’t fit organically (keyword stuffing).
The process of optimizing your meta descriptions will be almost identical to the process that you followed when optimizing your page titles.
First, set up a fallback meta description for each of your post types and pages. In some cases, you may want to use the {excerpt} of the post as the fallback meta description. However, depending on the content and post attributes, you can also make creative descriptions using post variables.
Once you’ve set your fallback descriptions, you should go through a bulk optimization process for the meta descriptions. In general, you will want to write custom descriptions for as many of the pages and posts as possible and not rely on the fallback description.
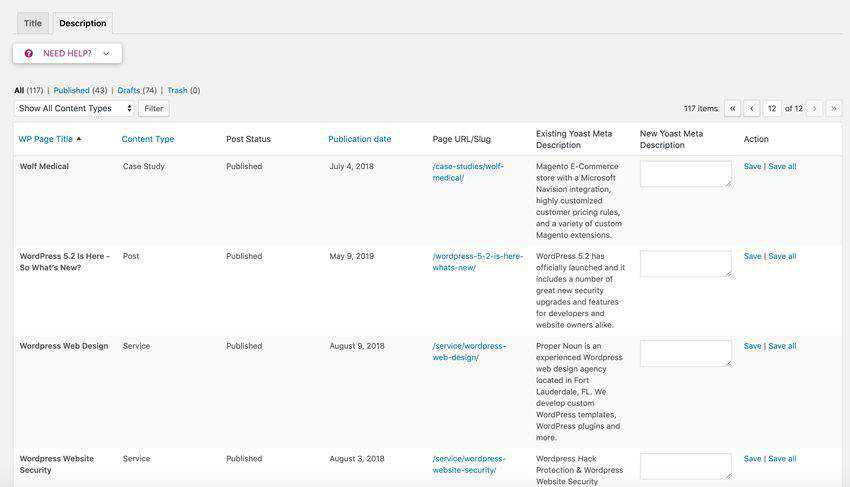
Think of creative, concise ways that you can describe the content of your page while organically including your focus keyword. If you’re able to, include a contextually related keyword as well.
Update Permalink Structure
The next thing that you will want to look at is your website permalink structure (or website URL structure). Google will read and analyze the words used in your page URL when attempting to learn about your page’s content.
For example, if you have a website, www.domain.com/tennis-rackets, the URL would be a strong indicator that the content of the page is about tennis rackets.
Now, let’s say we have the same page on our website, but the URL is www.domain.com/p?id=123. While the page itself may have the exact same words on it, the URL for this page gives no indication whatsoever as to the content of the page.
While URLs are a relatively minor ranking factor in the grand scheme of things, it is best practice to make sure they are as descriptive and concise as possible.
Redirecting Old URLs
Before making changes to any of your URLs, you’ll want to make sure to have a redirection plan in place.
There’s a great WordPress plugin called Redirection that will do the heavy lifting for you. Simply install the plugin, enable it, and configure it to monitor for permalink changes. Now, any time you modify a URL, the old URL will redirect to the new one.
Updating Your Permalink Structure
Within WordPress, your page URL structure is going to be known as your “Permalink” structure. You can set your permalink structure from inside of the WordPress Dashboard by navigating to “Settings > Permalinks”.
Once you’re on the permalink page, you should see all of the various permalink options. The default option, or the plain option, will utilize a parameter ID, for example, www.domain.com/p?id=123. You don’t want that.
So, what is the best permalink configuration for your website? Well, that really depends on the nature of your content.
In my opinion, it’s usually better to have a shorter, descriptive URL. So my preferred setting is the “Post name” permalink setting. This would also be considered the “best practice” from a traditional SEO sense.
However, let’s say your website or WordPress blog is focused more on news and current events. When you are publishing content that is dependent upon the date of publication like a news story, sometimes it is better to include that date in the URL.
In these scenarios, I would suggest using the “Month and Name” permalink setting as this will keep your URLs as short and descriptive as possible while still including the date routing.
Rewriting Poorly Formatted URLs
Page and post URLs should be concise, descriptive, and unique. They should also not contain unnecessary words or characters.
For example, if you were to duplicate a page that had a slug web-design-services, the duplicated page would have a slug web-design-services-2. You will want to rewrite this URL both so that it is less similar to the original page and more descriptive of the new page content.
You’ll also want to audit your page URLs for stop words. A “stop word” is a word that a search engine is programmed to ignore. Stop words include “a”, “an”, “the”, “in”, and other words like this. For a full list of stop words, you can get a pretty comprehensive list here.
WordPress URLs will use your page or post title by default, so many of your URLs may contain stop words or unnecessary words. It’s good to review all of the pages and post URLs, no matter how well optimized the content may be.
Redirecting Old URLs
The redirection plugin you installed prior to restructuring your permalink and rewriting your URL’s should’ve handled the rewrites for everything you’ve done so far. Now you should check for any 404 pages that may be getting triggered.
The Redirection plugin will have a section that will show every URL your website has served that has resulted in a 404 error (“not found error”). Some of these URLs will be the result of web crawlers and bots. Other links on the list will be due to broken links on your website or other websites.
Typically, if the page is returning as a 404, the safest bet is to redirect it to a page with similar content. If the 404 error is due to a misspelled URL, create the redirect and try to identify where the broken link is. If it’s on your website, fix it. If it’s on an external website, send the webmaster an email to see if they’ll fix it.
If the page no longer exists or the URL has changed, redirect the 404 to a similar page or the new page. If there are no pages at all that are similar you can redirect to the home page or to another page of your choice.
Don’t redirect the same page multiple times or redirect two pages into each other. This will create an endless redirect which will just mean a broken website for your users. If you do end up with a redirection error on the frontend of your website, review the redirects you’ve created for any potential redirect loops.
Check Image Alt Tags
The next thing you should do is run an analysis of your image alt tags on your website. An alt tag sets the “alternative text” for an image. Search engines will use alt tags to interpret the content of the image when indexing it.
When your website has images that are missing properly configured alt tags, you’re really facing two problems.
First, Google and other search engines will be unable to understand the content of the images on your website. This means that these images are less likely to show up in Google Image Search for your target keywords.
Second, images without alt tags will make your HTML invalid which can also impact your rankings. This isn’t to say that these would be major penalties, but they will be negative ranking factors though that can give competition leverage.
To optimize image alt tags, you start by going into your WordPress media library, clicking each of the images, and updating the alternative text value. Once you’ve completed this you’ll also want to check your theme’s template files for any images that have been hardcoded in. These images will need to have their alt tags manually updated.
Finally, any images that have been inserted directly into post or page content will also need to be manually edited. When you insert an image using the WYSIWYG editor, it writes the full image, as well as the alt tag, to your content as it exists at that moment. If you do not have an alt tag set when first inserted, you will need to revisit the post and update it.
Setup XML Sitemap
Next, you’ll want to make sure you have a sitemap setup for your website. A sitemap acts as a table of contents for your website and gives search engine crawlers an easy way to find and prioritize every page on the site. Yoast (and most other WordPress SEO plugins for that matter) will have a sitemap generation feature.
When generating your sitemap you should only include the pages, posts, and archives that have content that is worth indexing in the search engines. For example, you may have a custom post type that you’ve created for functional reasons and do not need an “archive” of these posts. Typically you would not want this post type archives to be crawlable or indexed by Google.
Sitemaps will also usually ensure that more of your pages are indexed more quickly. This isn’t to say that you must have a sitemap to get your pages indexed, but providing crawlers with easy-to-follow URLs will help.
Configure Schema Markup Data
Schema Markup was created as a joint effort by Google, Bing, Yandex & Yahoo!. It was created to provide a uniform way of structuring and interpreting different types of data. It helps search engines provide more informative results for users.
Schema markup data can be used for various types of data including website ratings, local business hours and contact information, and even to provide the relevant details of a news article for news feeds.
Properly configured schema markup is especially important if you are a local business or an e-commerce website. For a local business, it will let Google know your business location, address, phone number, hours and more. For an e-commerce website, you can use schema markup to share product information like title, price, sales, ratings and more.
There are a couple of approaches that can be taken when configuring your schema data.
If you’ve installed the Yoast SEO plugin, it will allow you to configure a good amount of your schema data right out of the box. Yoast includes basic organization data, breadcrumbs, social profiles, and a few other snippets. However, there may be other schema markup tags you want to include.
If you’re looking for a plugin to add additional markup to the site, you can explore some of the additional Yoast plugins or install one like All In One Schema.
If you do end up using one like All In One Schema, just make sure that once you’re finished configuring everything that you check the frontend of your website. Make sure that no tags are duplicated and that all of the tags are accurate.
If you’d prefer to set up your schema data without the assistance of a plugin, you’ll first want to establish what kind of schema data you’ll need and what the appropriate use is.
For example, you may want to include the rating schema and the local business schema. These each require different implementations and best practices.
To get the best idea for the best schema markup for your website, start by taking a look at some of your competitors. You can use the Google Structured Data tool to see exactly what types of markup your competitors use and then implement each one on your website.
It’s best not to over-optimize your schema markup or to include markup data that is irrelevant to your website or business. For example, if you’re a local business that does not produce newsworthy content, it would be a bad idea to include a News Article schema on your homepage with the hopes of being found in Google News.
Improve Website Page Speed
OK, if you’ve made it this far, congratulations! You’ve made it past the easy stuff. Now we’ll be getting into some of the more technical optimization tasks, starting with page speed optimization. The first thing you will want to do is re-run a test of your website on GTMetrix.
Even though you ran a baseline page speed test on your website, it’s good to run another one just prior to implementing your page speed updates. You never know what kind of new issues your website may be facing since running your initial audit.
If you are content with your current scores, you can skip this part. But if you are scoring below an “A” and showing a load time of longer than 2-3 seconds, you should implement as many of these changes as possible.
When it comes to WordPress, it’s always a good idea to utilize some sort of caching plugin. The two plugins that I find to be the best are WP Fastest Cache and W3 Total Cache, however, if there’s another caching plugin you prefer feel free to use that one.
Many of the settings and configurations I will discuss below will be able to be set in both of the plugins above. When another plugin is required I will include that plugin’s name as well.
Image Optimization
The most typical website speed issues that a WordPress website will face is unoptimized images and unscaled images.
Prior to serving an image on your website, you should make sure it’s optimized for the web. This process involves stripping away extraneous data from the image file that will serve no purpose for its use online.
There are external services that you can use like TinyPNG.com to optimize images in batches of images 1-20 at a time. Or, you can install a plugin on your site to optimize the images.
If you’ve already uploaded images to your website, you’ll probably want to just use a plugin to save yourself the time. TinyPNG.com makes a great plugin and provides a free API key for the service.
You should make sure to optimize all of your images for all of the image sizes that you are using in your theme. You will also want to make sure the plugin is set up to optimize images as they are uploaded.
In addition to image optimization, you will also want to make sure you’re serving images at the best size. For example, if the area that an image is meant to load is 800px in width, then you wouldn’t want to load the image much larger than 800px – 1000px (if there is some need for it to scale larger at some point).
Typically, you won’t want to use an image that is larger than 1800px – 2000px in width. Images this large would be used for things like hero images and full section background images.
You should avoid loading too many images of this size on any one page. If you do need to load lots of images at this size, it’s also a good idea to think about lazy loading them.
Minification of CSS & JavaScript
Another typical page speed issue that a WordPress site will have is with CSS and JavaScript minification. This process involves stripping out all whitespace, line-breaks, and comments from your CSS and JavaScript files.
In many cases, this can reduce the overall size of your static asset files by up to 80% of their original size. No matter how many individual static asset files you may be loading, this process will decrease your overall page size and improve page load times.
Within your caching plugin, you should see some settings for minification. In the W3 Total Cache plugin, this will be in the “Minify” section. I typically suggest starting by just enabling the default CSS & JS settings and doing a baseline test.
These settings can sometimes have adverse effects on how your website displays, so it’s best to give your site a full walk-through once you’ve enabled minification. Once you can confirm everything is working as expected, you can start enabling other minification features as needed.
However, unless there’s a real page speed concern, it’s probably best to just stick with the default settings.
These plugins will also combine these files together. So instead of loading 6 individual CSS files and 6 individual JavaScript files, it will combine the files together and load one JavaScript and one CSS file.
Defer Javascript Files
Deferring Javascript files will also help with your page render times. Javascript files “block” the rest of the page from loading while they are being loaded. So if you place Javascript files in the <head> section of your website, it will add additional delay to your initial page render time. You should always aim to include your Javascript file or files as close to the closing body tag as possible.
You can also use the async attribute on external scripts to load them asynchronosly. This means that the browser will only execute the script as soon as it is available and allows the rest of the page to continue rendering.
Gzip Compression
Gzip compression is a type of file compression that is implemented on your server. It compresses your website files prior to sending them to the browser, making them smaller and faster to download.
Gzip works similar to the CSS minification we discussed above. CSS and HTML files use lots of repeat text and whitespace. Gzip can compress common strings as well as whitespace, so it can shrink files by up to 70%.
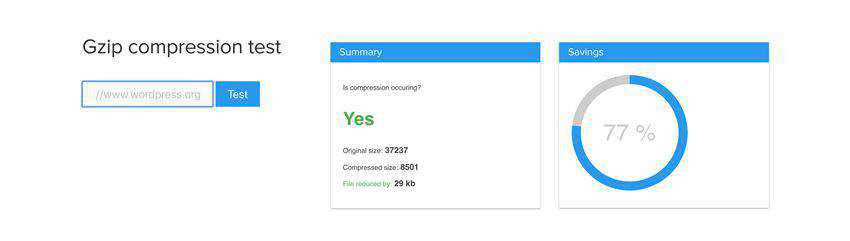
In order to use Gzip, you must first make sure your server has Gzip enabled. Depending on the type of server you are running, there will be different ways to achieve this. You can read more about each approach here.
You can also use the W3 Total Cache plugin and WP fastest cache plugin to enable Gzip, however, sometimes you will also have to enable it at the server level. You can always verify whether Gzip is enabled for your site by using this online tool.
Other Page Speed Improvements
It’s very likely you will have some other page speed improvements that need to be made. If you run into problems with any of the other page speed optimization tasks, you can always refer to our more in-depth article on website page speed here.
Validate Mobile Website
One of the most important factors when it comes to search engine rankings will be mobile usability. Is your website responsive and optimized for good user experience for tablet and mobile users?
If not, this will be one of the most important things for you to improve upon. This is actually for two reasons – 1) more and more people search for goods and services using their mobile phones 2) the search engines consider this a major ranking factor.
When it comes to having a properly optimized mobile website there are a few things you will want to consider.
Mobile Page Speed
Mobile page speed is going to be a very important factor, so make sure to implement as many or all of the page speed tips included above. Due to slower internet connections on mobile networks, page speed optimization is even more important for mobile usability.
Conditional CSS & JS
Try and remove any irrelevant CSS or JavaScript files from your mobile website. In many cases, there can be static assets being loaded for website components that are only used in desktop views. If possible, separate the CSS and JS for these components and conditionally load them on the desktop only.
You will likely need to have some development experience to do this with your theme files, but the plugins on your website may be a different story. If there are any plugins that you think may be irrelevant to your mobile user experience – disable them!
This will be another scenario where you can implement these changes by writing custom code or by using a plugin.
If you plan to use a plugin, the “Plugin Organizer” is a good option. In addition to a number of other conditional options, this plugin gives you the option to selectively load plugins on mobile.
If you plan to do this via your own custom code, here’s a general structure that you can follow. It’s always best to set everything up and test in a development environment before deploying to production.
Remove Any Unnecessary Images From Mobile Site
Images will typically be the heaviest things your website will have to load. So if there are images (or videos) you are hiding with CSS on mobile, then you may as well just remove them altogether.
Disable WordPress Plugins With Custom Code
First, identify each plugin that you don’t need to load on mobile and find the name of its root file. Now, create a function in your functions.php file that looks like this:
function non_mobile_plugins() {
return array(
'plugin-one/plugin-one.php',
'plugin-two/plugin-two.php'
'plugin-three/plugin-three.php'
);
}
This function just creates an array of the filename’s we will be disabling. Next, you’ll want to create a function to identify mobile devices.
function user_is_mobile() {
$is_mobile = false;
if ( strpos($_SERVER['HTTP_USER_AGENT'], 'Mobile') !== false
|| strpos($_SERVER['HTTP_USER_AGENT'], 'Android') !== false
|| strpos($_SERVER['HTTP_USER_AGENT'], 'Silk/') !== false
|| strpos($_SERVER['HTTP_USER_AGENT'], 'Kindle') !== false
|| strpos($_SERVER['HTTP_USER_AGENT'], 'BlackBerry') !== false
|| strpos($_SERVER['HTTP_USER_AGENT'], 'Opera Mini') !== false
|| strpos($_SERVER['HTTP_USER_AGENT'], 'Opera Mobi') !== false
|| wp_is_mobile() !== false
) {
$is_mobile = true;
}
return $is_mobile;
}
Finally, create a function to run prior to the plugins being initialized during page load. This function will first check if the user is on a mobile device. If they are, it will then go through the list of “not allowed” files and remove them from the load.
add_filter( 'option_active_plugins', 'disable_plugins_mobile' );
function disable_plugins_mobile( $plugins ) {
if ( !user_is_mobile() ) {
return $plugins;
}
$not_allowed = non_mobile_plugins(); // get non allowed plugins
return array_values( array_diff( $plugins, $not_allowed ) );
}
Now, when you load your site from a mobile device (or a tool emulating a mobile device) your website should load without the plugins you intended to remove.
Use Prefetch or Preconnect For 3rd Party Scripts
Most developers are aware of tactics like minification, caching, or gzipping assets on the server so that the page loads faster. In addition to these methods, there are some other page speed optimization techniques that are less widely used. These are known as prefetching and preloading techniques.
Resource prefetching allows you to let the browser know which assets the user is going to need before they actually need them. For example, you can preload static files like CSS, Javascript, and images. It’s a simple way to tell the browser that you will need specific resources at a certain point in the page load cycle. This allows the browser to grab it at that moment, so when it is actually requested, it will load quickly.
Here are the various methods that you can use for preloading assets.
Preloading
The rel="preload" attribute value can be used on a variety of static assets. These assets include CSS, JS, fonts, images, and others. To use preloading, you will add a rel attribute and an as attribute to your asset tags. For CSS, the value should be as="style", and for JavaScript as="script".
For example, a Google Font tag would look like this:
<link rel="preload" as="style" href='https://fonts.googleapis.com/css?family=Roboto:100,900'>
However, this will only preload the CSS file, not actually include the CSS in your document. To include the CSS you can either include the link tag lower down on the page, or just use some Javascript. For example:
<link rel="preload" as="style" onload="this.rel = 'stylesheet'" href='https://fonts.googleapis.com/css?family=Roboto:100,900'>
This tag will preload the font from Google, and then once loaded, it will apply the stylesheet to the page using the onload attribute.
DNS Prefetching
DNS prefetch lets the client know that assets of some sort will be needed from a specific domain so that the browser can resolve the DNS as quickly as possible. For example, let’s say you were going to load resources from ‘testdomain.com’, your tag would look like this:
<link rel="dns-prefetch" href="https://testdomain.com">
Now when a file is requested from the domain, the user won’t have to wait for the DNS lookup. This is a great way to handle bulky scripts from third-party sites like Google or social media sites.
Preconnect
Preconnect is similar to the DNS prefetch method, however, “preconnect” will resolve the DNS and also make the TCP handshake and TLS negotiation. Preconnect can be used like this:
<link rel="preconnect" href="https://testdomain.com">
Prefetch
Prefetch can be used to get specific assets. For example, if you’re positive that you’re going to need a specific image, you can tell the browser to request and cache the image for reference later. For example:
<link rel="prefetch" href="image.jpg">
Even though the names are similar, prefetch is actually pretty different than DNS prefetch. With prefetch you are actually requesting, downloading and caching the asset itself. While this can help speed up page speed, the browser also has the option to ignore this command. For example, a browser might ignore the request if the file is too large or the network is slow.
Amp Mobile Website
No tutorial on on-page optimization in 2019 would be complete without at least mentioning Google AMP. The Google AMP Project was something announced by Google in October of 2015. AMP, short for Accelerated Mobile Pages, is a web component framework that was built with user experience in mind.
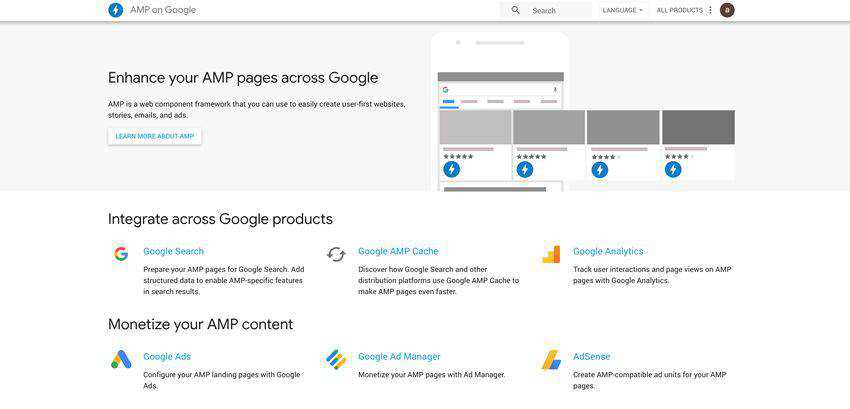
The AMP framework aims to improve the performance of mobile websites by reducing and/or eliminating things like third-party JavaScript and excessive CSS. Google reports that AMP pages typically load in less than one second and use ten times fewer data than the non-amp equivalent.
While implementing AMP pages may or may not have additional benefits for SEO, it’s not appropriate for every website. Sites that rely on a heavy amount of CSS or JavaScript may have to compromise too much of their design to accommodate the strict AMP guidelines. Further, it would seem the consensus is that Google is still not considering AMP as a ranking signal.
In our experimentation with AMP, we’ve found it most useful on websites that are dealing with news, current events, and content creation. While there are potential benefits for e-commerce stores, local businesses, and other websites, it’s not likely that you will see the return on your investment in the form of drastically improved search engine rankings.
Re-Run Online SEO Audits
Now that you’ve run through all of these optimization tasks, it’s time to see how far your website has come since your initial audit.
Start by running your website through GTMetrix one last time. Make sure that no new page speed issues have popped up since your last round of speed optimization.
Now, go through all of the same on-page SEO audits that you ran during your baseline testing. You can also run any new audits that you come across that you think may provide any valuable insight. No matter what audit you’re looking at, your goal should be to be as close to a perfect score as possible.
At the least, you should be scoring in the 90%+, or A range, on any of the various audits you’ve run. If you’re still not there, go through the audit and spend time trying to resolve the remaining issues your website is facing. Once you’ve gotten to the point you feel you simply cannot optimize any further, you can move on to creating new content.
Improve Thin Page Content
You’ve now completed your on-page SEO implementation and can start creating new content to attract new website users. I usually like to start by identifying and improving pages with “thin content”.
First, identify any pages that have fewer than 250 words on them. Next, do some competitor research to see how much content the top results have on their page. Now design new page content for each of these pages to meet or exceed whatever your competition is doing. Make sure that the content is unique and as informative as possible.
While your ideal word count would be a minimum of 500 words per page, that’s not always feasible. There will be occasions where a page may not really need 250 words, like a basic contact page. In these situations, it’s usually fine to forget about minimum text lengths and just worry about user experience.
Expand On Topical Content
Now, take a look at each of the pages you have on your website and identify the ones you’d consider “money pages”. For example, if you’re an attorney or an accountant, these may be “services” pages and your home page.
Using a local lawyer website as an example, think about a “Personal Injury Law” service page as a “money page”. This page may include information about what personal injury law is, the types of personal injury law that a firm handles, client testimonials and ratings, frequently asked questions and various other pieces of information.
To build authority for the topic, you’ll want more than just the one page, you want to create new pages and posts to expand on the topical content. For example, you might create new authority pages that cover specific areas of personal injury law in detail, like slip-and-fall, car crashes, and dog bites.
You could also create personal injury law case studies or expert articles discussing interpretations of important personal injury trials in your state. Articles about current events that pertain to the topic also make for excellent SEO content.
The more content that you can create that expands on a specific topic, the more expertise Google will associate with your website for that topic. This is called expanding your websites topical depth. As a result, your website will not only begin to rank for the keywords you’ve targeted but will likely rank for several other keywords as well as Google indexes your pages for more search terms.
Internal Linking Structure
As you create new pages, make sure to continue interlinking them. Build links between each of the new pages whenever there is relevant content to link to. You’ll also want to link back to your topical money pages from each of the topical subpages. For example, your “dog bites” page and your “slip-and-fall” page would link back to your “personal injury” money page.
Having an internal linking strategy before you get started is always good, but not always necessary if you’re new to SEO. If you’re unsure about how to utilize internal linking, your best bet is to just get started by creating great content and creating links whenever contextually appropriate. Try to keep your links to link count to 2-4 links per page or article depending on article length. It’s also good to link to a third-party expert website when relevant.
Start Creating Articles & Blogs
Once you’ve finished rounding out your page content strategy, you can now start creating new content for your site on a schedule. For most website owners, this will come in the format of blog posts or articles.
Blog posts are a great way to share your valuable insight with potential website users, customers, and clients. The articles you create should be engineered to “attract” the type of people who will be likely to engage your products or services.
The best way to get started is to think about the types of questions or concerns this audience may have, and then write an article to address them.
For example, if you’re an accountant and find that your new clients always have the same 2-3 questions, write 2-3 new articles answering these questions. Now any potential clients that type these same questions into Google will receive your website as an answer.
If you’re a landscaper that provides specialty services, write an article that details different landscaping projects in a neighborhood. Use photo examples, videos, testimonials, and any other assets to really make the article engaging. Or, you can get creative with content and write an article critiquing the landscaping at famous locations around the world like the White House and Buckingham Palace.
What’s important is that the content you create is engaging, well written, it should appeal to your target audience, and it should be thorough. While most people will tell you to write a minimum of 500 words, it’s my belief that you should write a minimum of 800 – 1000 words.
Unless the topic is truly that simple, or you’re just writing a quick recap on an event, it’s rare that the most thorough answer to a complex question will be just 500 words.
Sure, you can thoroughly answer a question in 500 words, but the most thorough answer will also contain examples, resources, references and more. The best rule of thumb is to simply write as much as you can while keeping things informative and interesting.
I also suggest writing your articles in bulk and then scheduling them to post on a regular interval. Regularly posting on a consistent schedule sends great signals to Google as it loves fresh, authoritative content.
After publishing an article on your website, make sure to share it around. Post the article to all of your social media channels including Facebook, Twitter, LinkedIn, Pinterest, Youtube, and any others you may use. You can also post to social news aggregators like Reddit, Hacker News, and many others.
Syndicating your content to social media channels, URL shorteners, and other websites around the internet is a great way to get your articles noticed. Just make sure not to re-post the article anywhere as duplicated content.
Final Thoughts On On-Page Optimization
On-page optimization has always been an important part of a well-rounded SEO strategy, however, it has become a much more powerful ranking factor over the past year or two. While there are plenty of websites that may rank on page one for their target keywords that don’t have a broad backlink profile, there are not very many poorly optimized websites achieving top 10 rankings.
Proper on-page optimization in 2019 also involves a lot more than just optimizing your meta tags. Website page speed, mobile usability, and user experience best practices have become extremely important ranking factors.
Don’t just write 500-word articles – take a strategic approach when creating your content. Take into consideration things like the length of your competitor’s articles, article readability score, contextual keyword inclusion, TF*IDF scores, and internal linking.
The more authoritative and informative you can make your articles, the more likely Google is to rank them. This also will improve your chances for other websites to link back to your website.
Websites that are well optimized and free of issues like duplicate content and empty metadata are much less likely to be impacted by things like algorithm changes and search engine penalties. Use my approach, build on it, adapt it as you learn new techniques, but make sure that there is always a strong on-page optimization strategy at the core of all of your SEO campaigns.
Related Topics
Top