Generally speaking, if you ask 10 WordPress developers how to do something, you’ll receive ten different answers. But that speaks to both the versatility of the CMS and that there is more than one solution to any given task.
Recently, I faced the challenge of setting up an HTML5 video inside a WordPress page. It’s in a static location and would need to be replaced every so often. While it’s fine to use the Video Shortcode, in this case I wanted to make things extra simple for the folks who would be updating the page. I didn’t want them to have to learn what a Shortcode was or how to use it.
So, the simplest solution (in my mind, anyway) was to create some custom fields where the related video files could be uploaded. From there, the theme’s template would automatically create the necessary code to display the video. Here’s how I did it:
Project Requirements
You’ll of course need a WordPress site and access to edit your theme (please use a child theme if you aren’t already doing so). Some familiarity with PHP and HTML will also be a big help. Beyond that, you should have:
- A way to create custom fields. The free version of Advanced Custom Fields (ACF) will do the job quite well. Install and activate it on your WordPress website.
- A video – ideally in multiple formats. Although MP4 files are now supported across every major browser, it might not be a bad idea to provide a WEBM version for extra coverage. And, while you’re at it, a FLV fallback for those using really ancient browsers couldn’t hurt. You’ll want to make sure that each version of your video is set to the same resolution.
- A ‘poster’ image. Either a screen capture or custom graphic made to the highest resolution your video will be played at.

Step 1: Create the Custom Fields
Once you’ve installed and activated the free version of ACF, go to the Custom Fields menu inside WordPress and then click Add New.
Inside your new set of fields (ours are called ‘Video Fields’), you’ll need to create an ACF File field for each video format you plan to upload, plus another for the poster image. In our setup, we have fields for MP4, WEBM, FLV and a Poster. For each file field, make sure to select the radio button in Return Value that says “File URL”. Also, be sure to make note of the Field Names – we’ll need those later on.
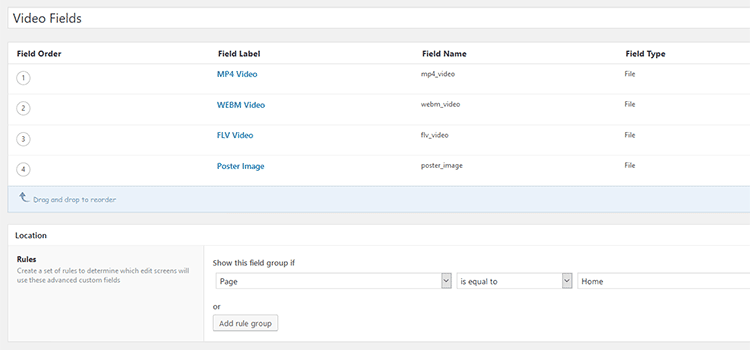
Next, inside the ACF ‘Location’ setting, assign your new fields to whatever page or post you’d like and save your work. When you go to edit that assigned page, you should see the fields (you may have to scroll down a bit to find them).
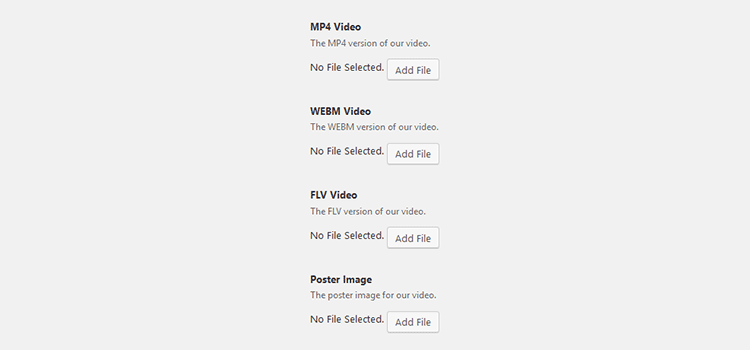
Step 2: Upload Video Files
Navigate over to edit the page or post where you assigned your new custom fields. From there, it’s a matter of uploading the correct files. Once you’ve uploaded the requisite files, save your page/post.
Step 3: Edit the Template
Now comes the fun part – adding some PHP magic to your theme’s template. If you’re not familiar with the WordPress template hierarchy, now may be a good time to study up on it.
Find the correct template file and location where you’d like to place the video. Then, copy and paste the following code snippet and customize to match your needs:
<?php
// Get the Video Fields
$video_mp4 =  get_field('mp4_video'); // MP4 Field Name
$video_webm  = get_field('webm_video'); // WEBM Field Name
$video_flv =  get_field('flv_video'); // FLV Field Name
$video_poster  = get_field('poster_image'); // Poster Image Field Name


// Build the  Shortcode
$attr =  array(
'mp4'      => $video_mp4,
'webm'     => $video_webm,
'flv'      => $video_flv,
'poster'   => $video_poster,
'preload'  => 'auto'
);

// Display the Shortcode
echo wp_video_shortcode(  $attr );
?>
The first section of code references the names of the custom fields we created in Step 1. We’re creating a PHP variable for each field (they will output the URL of their respective file), which we’ll need to use in the middle section of code.
Down in that middle section, we have an array of attributes for the wp_video_shortcode function. Notice that there is an attribute for each file type. We’re also choosing to preload the video, but that’s completely optional. Here you can also set width, height, loop and even (gasp) auto-play the video if you like.
The bottom section of code is outputting the result of our work into our template.
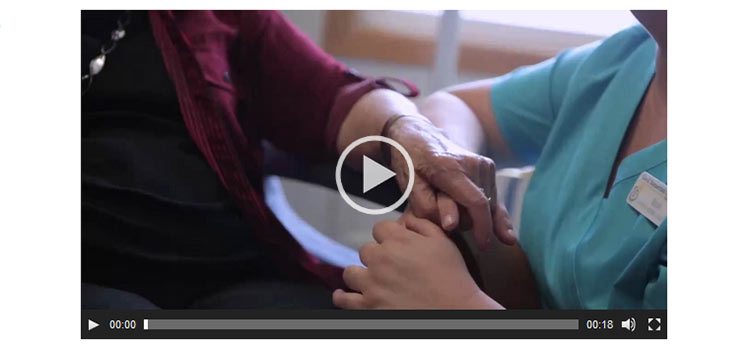
Once you have everything set up satisfactorily, you will want to save your template and upload it to your website (or just save if you’re using the built in WordPress theme editor). Then, check your page on the front end to make sure the video is properly displayed.
WordPress has a HTML5 video player built right into the CMS and the default player looks and functions quite well. But you can style various options if you want to give it a more personal touch. Inspect the output code with your browser’s developer tools and make note of the various CSS classes. For example, the container element has a class of .wp-video. You may also want to take a look at a tutorial for a more in-depth look at possibilities.

Custom Fields Simplify the Process
Using custom fields can bring a wealth of new functionality and design possibilities to WordPress. But a core element of their awesomeness is that they can make managing content easier. Regardless of who will be adding and editing content, custom fields can streamline the entire process. That benefits us all, but it’s especially nice for users who aren’t expert developers.
Adding some simple functionality like the HTML5 video fields above can greatly reduce the learning curve a new user faces. Instead of having to think about what they’re supposed to do, it’s now become a matter of uploading a few files.
In the end, that little bit of extra work up front can save everyone some time and headaches for the life of the website.
Top